I was following a written tutorial for creating a robot in NVIDIA’s Isaac Sim and found myself going down a rabbit hole to learn as much as I could about how the different joint examples work by reverse engineering each of them.
I started off following the Building a Simple Robot learning path from NVIDIA with my local Isaac Sim setup in a Conda environment. So my process to run Isaac Sim is a bit different than the workstation approach they provide in that tutorial.
If you don’t have Issac Sim installed yet, this is the best installation guide I’ve found that will help you get that up and running. I wrote an article that might help you navigate any hurdles that come up along the way.
Activate the conda environment and run this command to start Isaac Sim:
isaacsimOnce that’s running, you’re all set to build your first robot!
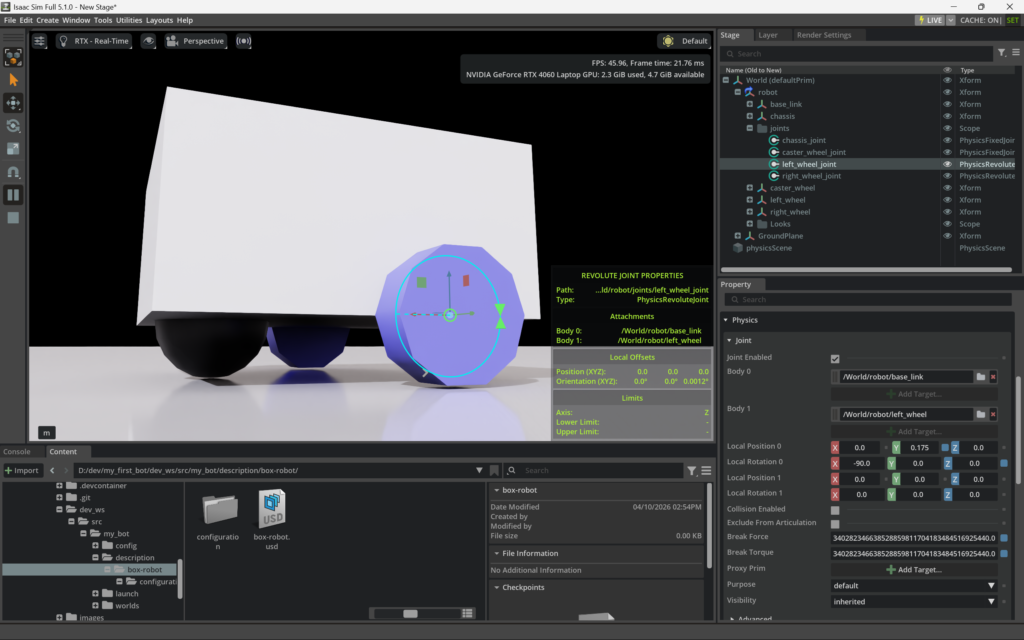
It wasn’t long before I became bored with simply following directions saying, “click this and enter that value in a particular field” which has been a consistent challenge whenever I’m learning something new. For some reason, I always diverge from curriculum and have to go exploring on my own.
I learn best by reverse engineering technology and certainly gained a lot of additional knowledge this time around. With what I know now, I’m ready to get back into the learning path and start working on controlling robots in Isaac Sim.
Since I couldn’t find an overview on the different joints, I thought I’d make a video of what I learned. This would be tricky to write out in an article, so I’ll provide a link to the video below. First, here are some details that I’ve collected about each of the joints you’ll find in NVIDIA’s examples.
Standard Joints
These are the standard joints we’ll spend most of our time on:
| Isaac Sim / PhysX Joint | Mechanical / Robotics Term | Degrees of Freedom | Real-World Application |
| Fixed | Rigid Bond | 0 | Bolted brackets, welded parts. |
| Revolute | Rotary / Hinge | 1 Rotation | Robot arm elbow, wheel axle, motorized pivot. |
| Prismatic | Linear / Slider | 1 Translation | CNC axis, 3D printer rail, pneumatic piston. |
| Spherical | Ball and Socket | 3 Rotations | Human shoulder, trailer hitch, omni-directional neck. |
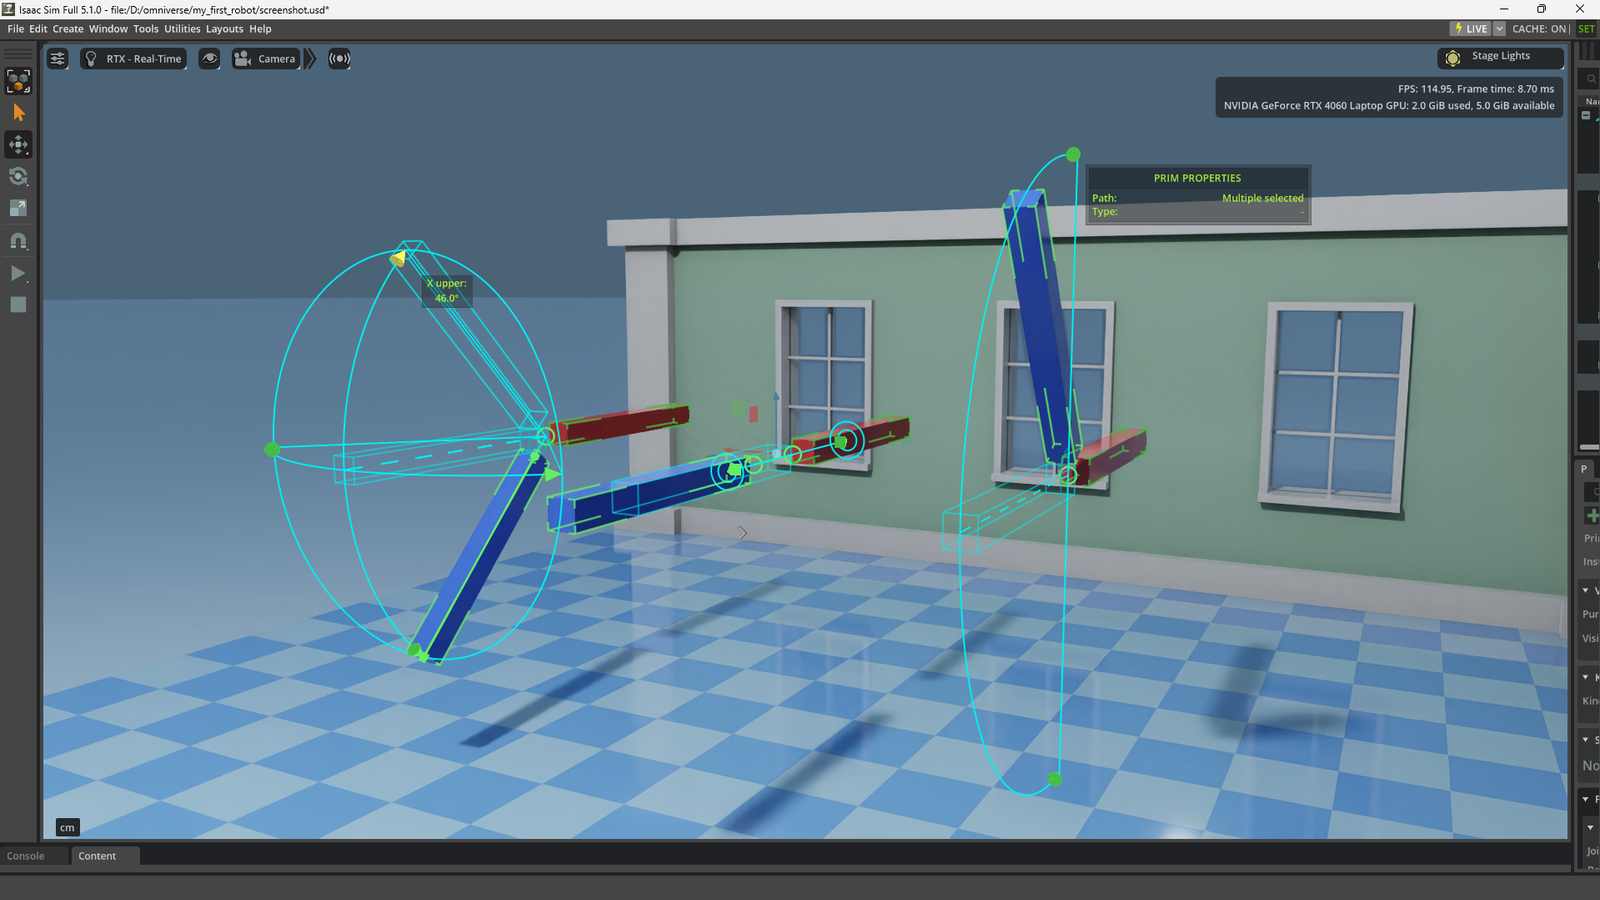
Specialty Joints
These joints are nice to have a basic understanding of in case you have a specific project where they’d come in handy.
| Isaac Sim Joint | Core Concept | Degrees of Freedom | Real-World Application / “Cheat” |
| D6 Joint | The “God” joint. You can manually lock, free, or limit all 3 translation and 3 rotation axes individually. | Variable (Up to 6) | Custom or combined joints (like a cylindrical telescope that rotates) or complex humanoid ragdoll hips. Used in Rigid-body Ropes example. |
| Distance Joint | Enforces that two connected bodies must strictly maintain a set minimum and/or maximum distance from one another. | Variable | Wrecking balls, heavy vehicle towing, or acting as an optimized “invisible cable” without requiring a heavy chain physics setup. |
| Gear Joint | Monitors the rotation of one revolute joint and mathematically forces a second revolute joint to turn at a specific multiplier. | N/A (Coupler) | Transmissions, vehicle differentials, or a mechanical watch where you don’t want physical teeth to collide and glitch. |
| Rack and Pinion | Monitors a linear sliding joint (Prismatic) and translates that distance directly into a forced rotation on a Hinge joint (Revolute). | N/A (Coupler) | Car steering columns, CNC machinery, or specialized automated sliding gates and heavy industrial grippers. |
Video
With that, let’s jump right into the video to learn more!