In this article, we’re going to import a simple ROS URDF robot into Isaac Sim. This will help us understand the workflow, the tools, the data that represents the robot in the different platforms, and how to navigate challenges that might arise in the conversion process.
The most exciting part is that this exercise will improve our understanding of the architecture behind NVIDIA Omniverse and explain why it’s such a powerful tool for working with real-time digital twins!
Where This All Started
A couple of years ago, I followed an Articulated Robotics tutorial to create my first robot using ROS that ran in a Gazebo simulation. I set that up to run in Docker, so it was easy to spin up, and made the project available on GitHub. You can clone that repo locally if you’d like to follow along.
Here’s a short video of me driving that simple robot around in Gazebo with streaming ROS data!
These days, I’m still interested in ROS but I’ve moved into simulating robots with USD in Isaac Sim, which is part of NVIDIA Omniverse. So, I thought I’d try importing my original bot into Isaac Sim to test how how the process works and to see if I can get my robot converted into USD.
Flattening XACRO into URDF
ROS uses XACRO files, since they’re modular and offer more features during development, while URDF is a single flattened version that is compiled and read by simulators like Gazebo and Isaac Sim.
In my original project, all the data that describes the robot lives in multiple .xacro files. The first step for importing my example robot into Isaac Sim is to get those converted into a flattened URDF. I uninstalled Docker to help free up space on my C: drive for locally hosted Omniverse projects. Since Docker is where I had originally installed ROS, I decided to use a Python PIP package called xacrodoc to convert the files without having to install ROS.
I’ll focus on setting up ROS for Isaac Sim in a future article.
First, I opened a terminal to create a new Conda environment to make it easier for me to clean house later; I activated that environment, then installed xacrodoc. Here are the commands to do that:
conda create -n xacro_gen python=3.11 -y
conda activate xacro_gen
pip install xacrodoc
From there, we navigate to the robot’s “description” folder (dev_ws\src\my_bot\description), start the Python REPL and run the following short script:
from xacrodoc import XacroDoc
doc = XacroDoc.from_file("robot.urdf.xacro")
doc.to_urdf_file("box-robot.urdf")
That works because the robot.urdf.xacro file includes references to the other files in the folder, so they’re all pulled in during the conversion process.
When that’s done, we end up with a single, flat box-robot.urdf file that we can now import into Isaac Sim!
Importing URDF Into Isaac Sim
With Isaac Sim running, go to Window > Extension to open the extension manager.
Search for “URDF Importer” extension (id = isaacsim.asset.importer.urdf ) and make sure it’s enabled.
Now you can go to File > Import and navigate to our box-robot.urdf file, but don’t import it just yet. We’ll need to dig into the import settings before we’re ready to hit the import button.
Import Settings
We’ll set up the import to work with this particular mobile robot. The settings will vary depending on the type of robot you’re working with.
Here are the specific settings I used for importing this project’s robot:
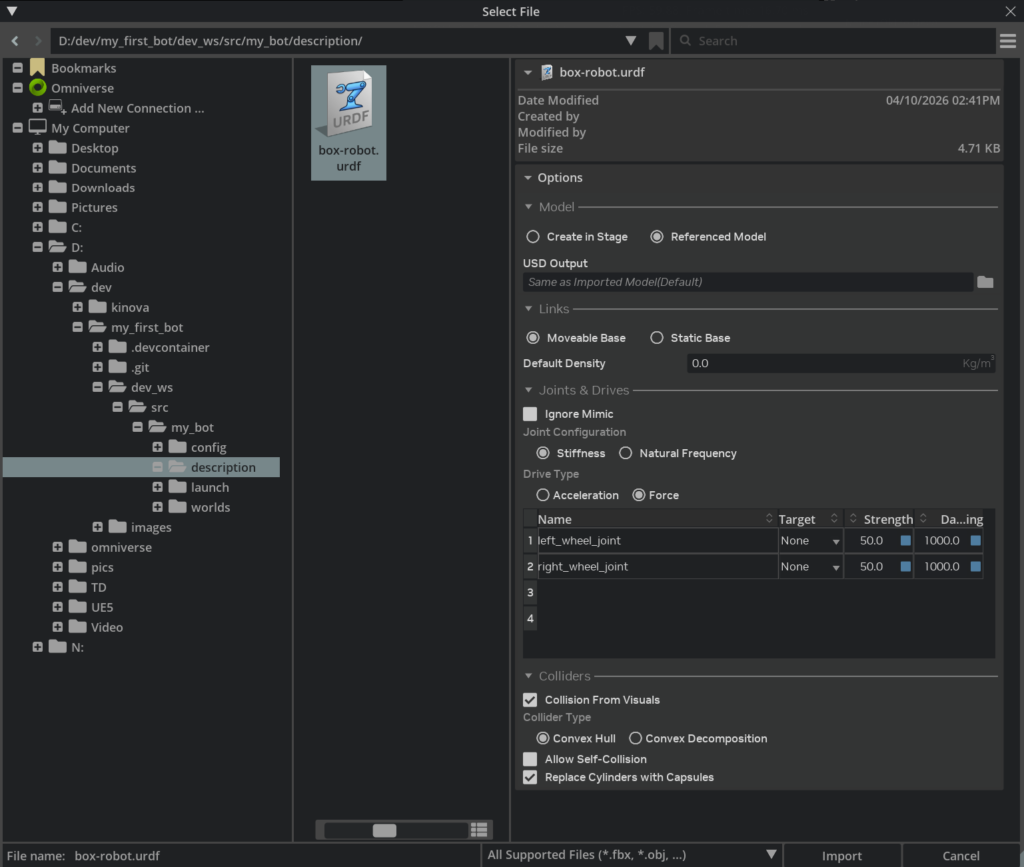
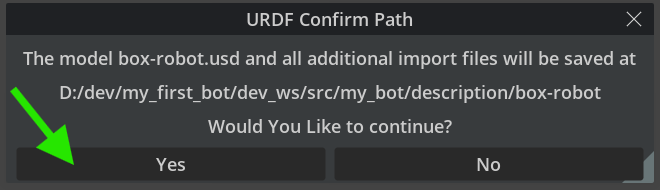
When you hit import, you’ll automatically convert the URDF into USD at the path that you defined under “USD Output”, or it will land in the same location as our URDF file, so just confirm that location by hitting “Yes” in the dialogue window.
If you don’t see anything right away, simply adjust the scene lighting from Stage to Default.

One last thing we’ll need is to add a ground plane so our robot doesn’t fall into the darkness when we start our simulation.
Do that by going to Create > Physics > Ground Plane. You’ll need to move your robot up a little to sit on the ground plane.
Here is a shot of our little box bot looking all majestic with a low-angle view. You’ll also notice our box-robot.usd file has been created for us, too!
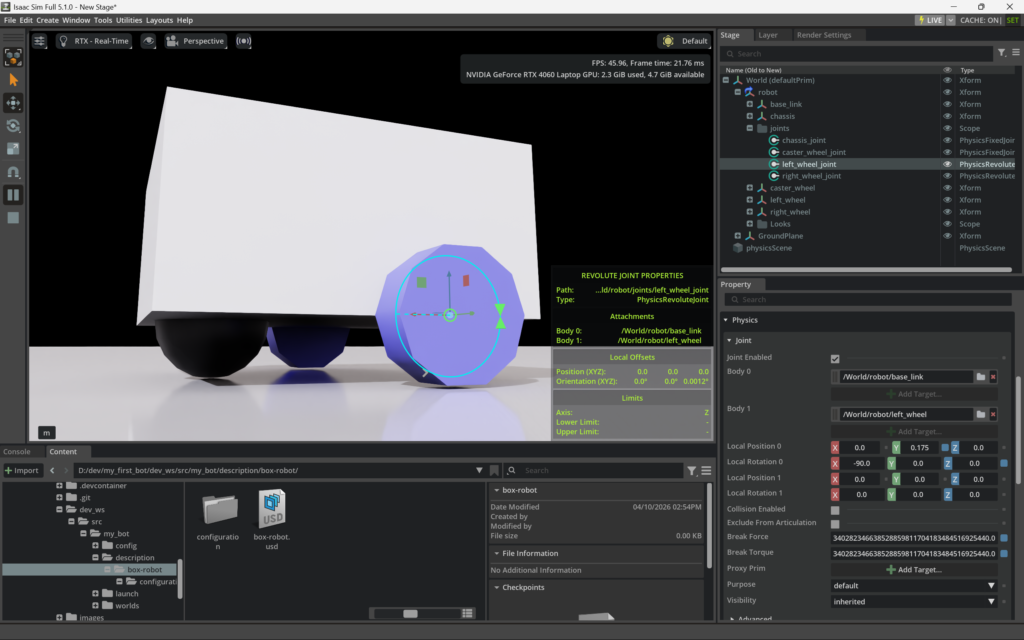
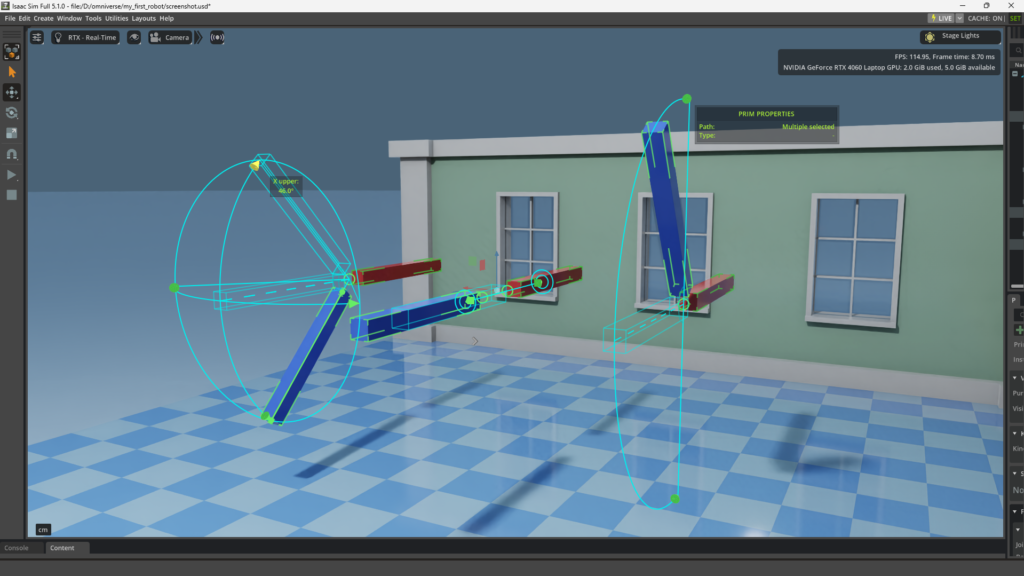
If you don’t see the joint parameters, like we see here, you can click the eye icon and go to Show by Type > Physics > Joints.
Evaluating The Conversion
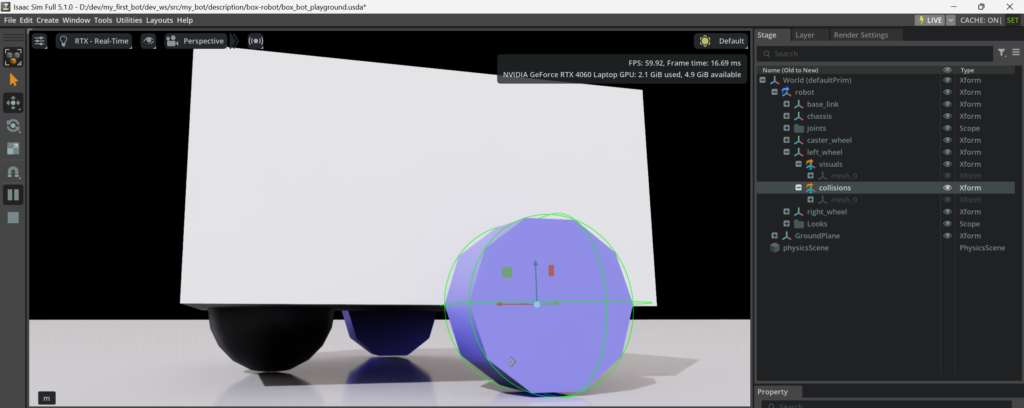
At this point, if we run the simulation by hitting the play button on the left toolbar you’ll find that our robot doesn’t go anywhere. You’ll also notice the wheel meshes look a bit rough.
Let’s dig into why.
Wheel Roughness
Because my original robot was made up of simple cylinder meshes, Isaac Sim converts those URDF primitives into low-poly “Tessellated USD Meshes.”
Had our wheels been imported as a high-poly CAD file or an FBX mesh that came from Blender, we wouldn’t have this problem visually. Those are pre-tessellated meshes made of thousands of triangles, which makes them look pretty.
This low-poly conversion doesn’t mean our robot will wobble like it was rolling on stone wheels, since the importer also creates a mathematically calculated collision mesh that helps optimize the PhysX physics engine calculations to determine if our wheel is hitting the ground.
It would take a lot more power for PhysX to calculate the position of each of the visual triangles! The collision mesh provides the data needed through a single calculation.
This becomes obvious once we get our robot moving.
Before we do that, here’s a screenshot showing the collision mesh selected and the simulation running so you can see how our rough polygon wheels sit slightly off the ground. That’s because Isaac Sim is using the collision mesh to calculate physics and not the visual wheel, ensuring our robot will roll smoothly.
This is a perfect demonstration of how the architecture behind NVIDIA Omniverse separates the RTX rendering engine from their PhysX engine to optimize real-time performance!
Moving Our Robot
I used ROS to control the original robot in my Gazebo project. Setting up ROS is outside the scope of this tutorial, so we’ll make some minor adjustments to the joints to get our robot moving for this project. Your needs may vary, depending on your robot and your project’s requirements.
For simplicity sake, let’s just spin one wheel so our robot drives around in circles. You can easily adjust both wheels to have it move forward, backward, or any direction you choose.
Controlling our robot with keyboard commands is also outside the scope of this tutorial, but I’ll be sharing info on doing that in future articles and videos.
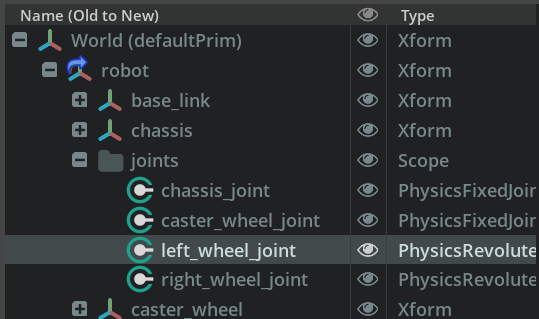
In the Stage, navigate to joints and select the left_wheel_joint.
In the Property panel, set the Target Velocity to 400 and the Damping to 1000. We need both of these set to ensure the revolute joint mimics a motor.
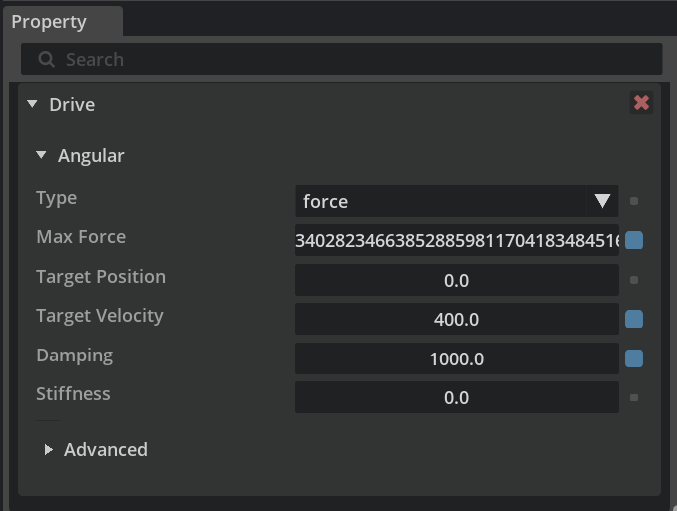
In this case, setting Stiffness to 0 is a crucial step when using Target Velocity. If Stiffness is high, the robot will “fight” itself to stay at a certain angle.
I go into greater detail about how joints are effected by these settings in this video: Learning Isaac Sim Joints (Reverse Engineering Method)
Here’s a short video of our completed USD robot driving in a circle!
You might find the visual on the wheel makes it “feel” a bit wobbly, but if you watch one corner at the top of the box you’ll see it’s completely stable. The lower frame rate of my snipped video doesn’t help, but you will find it moves smoothly when you run this locally.
Data Comparison
We won’t dig too far into the contents of data files themselves, especially since the USD that’s generated is binary, but it seems worth while to review what occurred during this workflow at a high-level.
Original XACRO Files
We started off with our original project’s XACRO files that describe our robot:
- robot.urdf.xacro – The entry point for defining our robot with XML
- robot_core.xacro – The main components of our robot’s structure
- gazebo_control.xacro – The instructions for driving our robot
- inertial_macros.xacro – The XML based macros to provide calculations and variables
Compiled URDF
We then used the PIP xacrodoc tool to compile our XACRO files into a single URDF file that’s ready to be imported into Isaac Sim:
- box-robot.urdf – Contains all the data from the modular XACRO files.
USD Data
Finally, the URDF importer extension converted the URDF XML into the USD data that Isaac Sim can reference:
- box-robot.usd – The main entry point for our robot in USD (binary).
- configuration/box-robot_robot.usd – The configuration entry point for our robot
- configuration/box-robot_base.usd – The base structure our robot
- configuration/box-robot_physics.usd – The physics data for our robot
- configuration/box-robot_sensor.usd – The sensor related data for our robot
With that done, we’re now able to reference our robot in any USD stage and adjust it to move however we’d like for that specific project.
Key Takeaways
The process of converting a series of XACRO files into a flattened URDF and then importing that into Isaac Sim to produce a USD version of our robot is fairly straight forward.
The tricky part is learning the import settings that work best for your robot and making any adjustments needed to fit you project goals.
I’ve chosen my favorite simple test robot to go through this process the first time, but I’d expect having to do some additional troubleshooting for a robot arm.
I’ll be heading towards using ROS in Isaac Sim and tackling controllers soon, incase you’re interested in joining me.
Project Video
Here’s a video I made running through the same process we just covered in this article: