Two years into building my online presence, I’m finally finding my process and seeing evidence that sharing what I’m learning is meaningful. I’ve used my own videos and articles to remind me how I did something technical. Plus, I’ve been able to look back on how far I’ve come on some topics I’ve been exploring. The cool part is that documentation I’ve created for myself turns out to be the most popular with my audience. That’s is exactly what I was hoping!
Since my online presence is growing, I thought it would be nice to share how I got here and where I’m heading. So, I decided to use Blender to create an animated timeline that travels through my lifelong journey with technology.
This article provides details around how I made my new YouTube channel trailer, My Journey Through the Tech-Multiverse, which took more time than I expected – but was the perfect learning experience for working with Blender to make motion graphics. The week long process made me miss working in Flash, but that was 2D only making this type of animation nearly impossible.
Modeling & Animation Plan
I did some research to figure out what technique I was going to use for the animation. My goal was to see if I could create what I had in mind and figure out how to pull it off with the minimal effort. Many of the techniques I evaluated felt overly complex and didn’t align with what I had in mind.
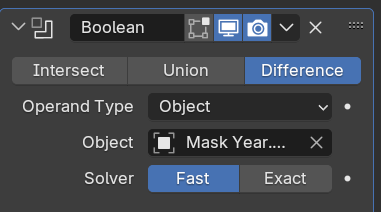
I finally decided to use boolean masks, even though I read it may not be the most efficient approach. That may have caused some lag in the viewport animation later on, which I’d regret later, but it worked fine initially.
Overall, I wish what I made was closer to what I envisioned, which was to be more like following branches on GuHub, but I think it does the job just fine.
Learning Curve
It’s been awhile since I’ve done anything in Blender, so it took me a bit to get warmed up once I got started.
This video was helpful to remind me how to create a simple outline for each year’s text.
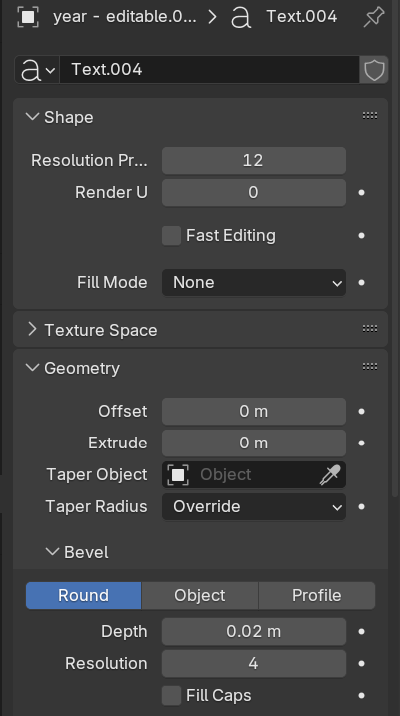
I landed on the following text settings, before converting the editable text to a mesh so that I could use the Boolean Modifier to mask it:
Fill Mode = None
Depth = 0.02
Here’s the modifier settings I found worked best:
I still found myself adjusting the z dimension of the year text to 0.04 to get it to look right. It almost creates a glistening effect as the camera flys by, which was cool!
Once I got my general look and feel, and understood how I was going to pull this off, it was time to model the entire timeline!
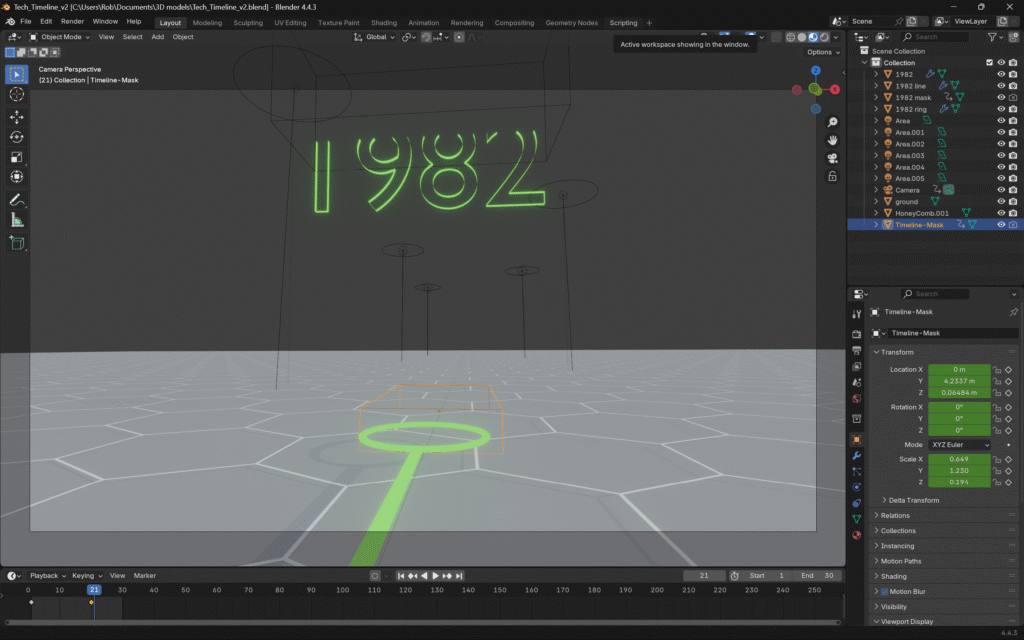
To do that efficiently, I needed to organize my project to make it easy to reuse elements.
Before:
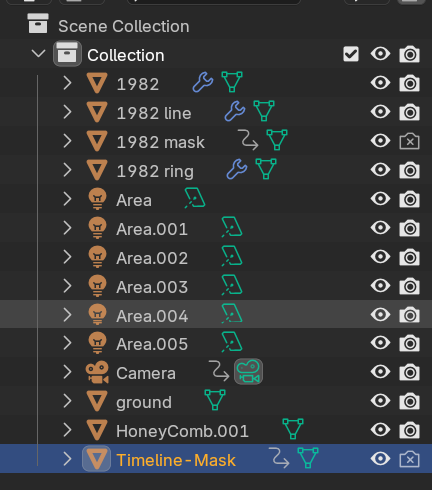
After:
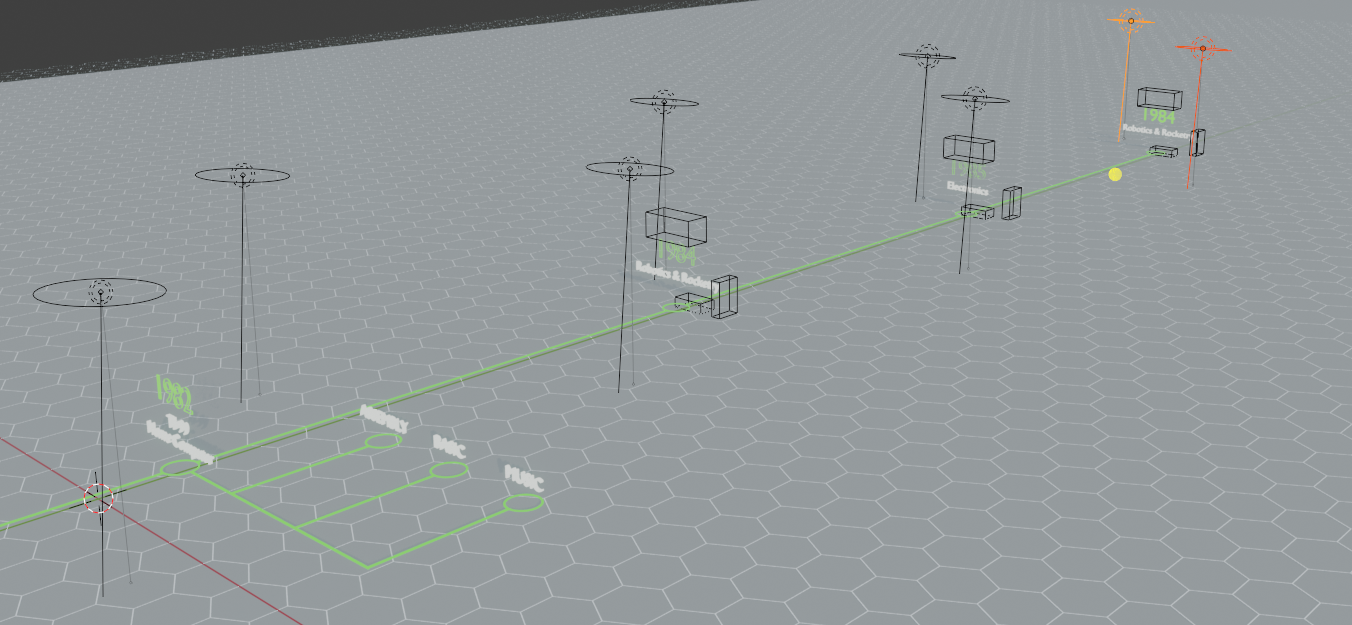
Now, I can replicate the 1982 collection for each milestone’s line, while leaving the world elements alone.
After refining all that, and getting my first sub branches laid out, I was finally able to think about how the overall design will work over time, allowing me to see everything as it animates. I wasn’t sure how all this was going to come together visually until I had all the technical nuances and general game plan ironed out.
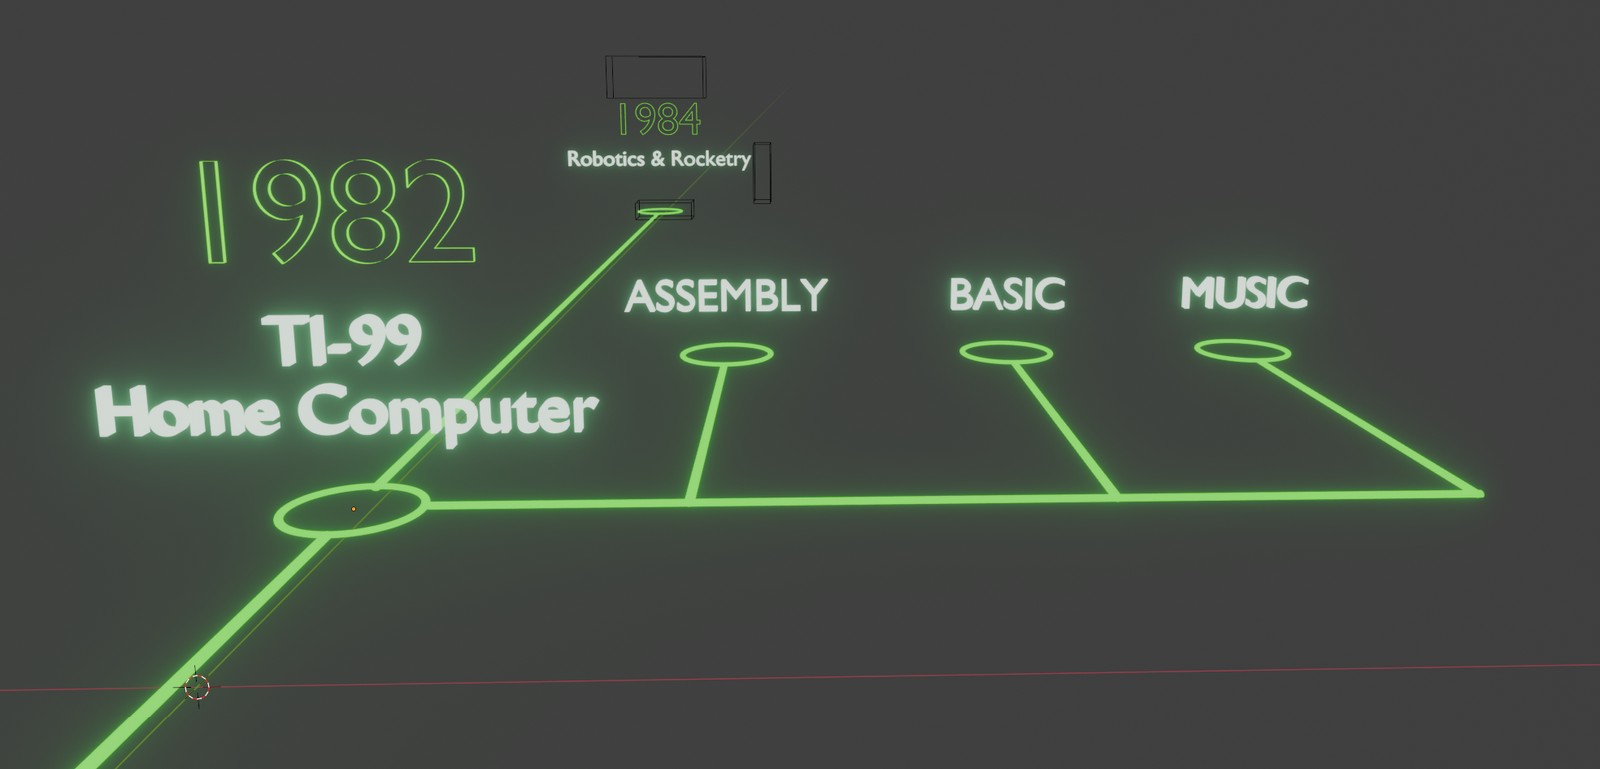
From here, 1984 became my template for each subsequent year.
As I continued, I found that I was going to need to replicate my area lighting for each section, so I made sure to include those into my template.
I thought about have them light up as each year became visible, but then I realized leaving them on might create a sense of anticipation and curiosity for the viewer to hang around and see where it’s going – hopefully making it more engaging.
My Technology Timeline
- 1982 TI-99 computer
- ASM
- BASIC
- Music
- 1984 Robotics & Rocketry
- 1985 Electronics
- 1986 BASIC
- 1995 Computer Hardware & IT
- 1999 Custom Built Computer
- 3D
- Video Editing
- Flash
- Web Design
- 2000 Business Solutions & Marketing
- Data
- JavaScript
- PHP
- 2006 Multimedia Freelancer
- Motion Graphics
- Midi
- 2010 Flash Developer
- 2013 Flash to HTML5 in XML
- 2014 Prototyping & Accessibility
- 2015 Application Design & Development
- 2018 Enterprise Systems Design & Architecture
- 2020 Machine Learning
- Training
- Pipelines
- Security
- IoT
- Drones
- Robotics
- 2021 Technical Product Management
- 2022 Senior Research Engineer
- 2023 Tech-Multiverse!
- 2024 AI Strategy
- 2025 Agentic AI
- XR
- Music
- IoT
- Robotics
Animation
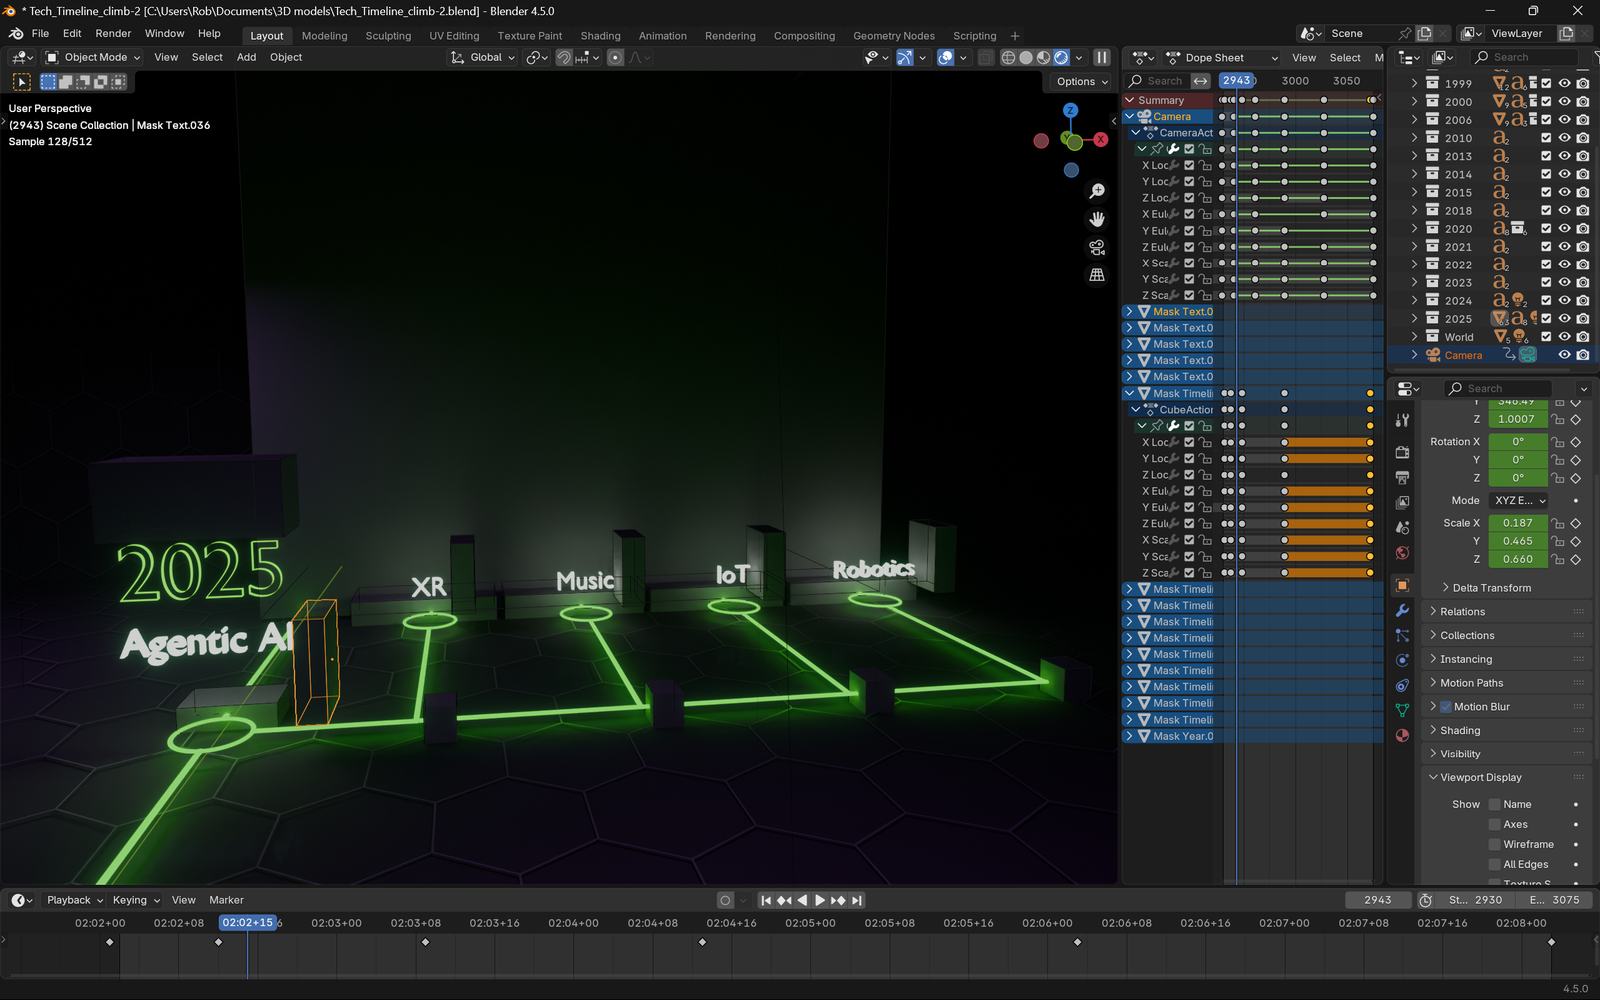
Once I had the entire timeline planned, it was time to animate everything.
Getting the timing just right was tricky – especially as my computer started lagging with all the details.
Thankfully I learned Blender has a dope sheet where I could adjust large blocks of keyframes – which I’m a big fan of in any animation project:
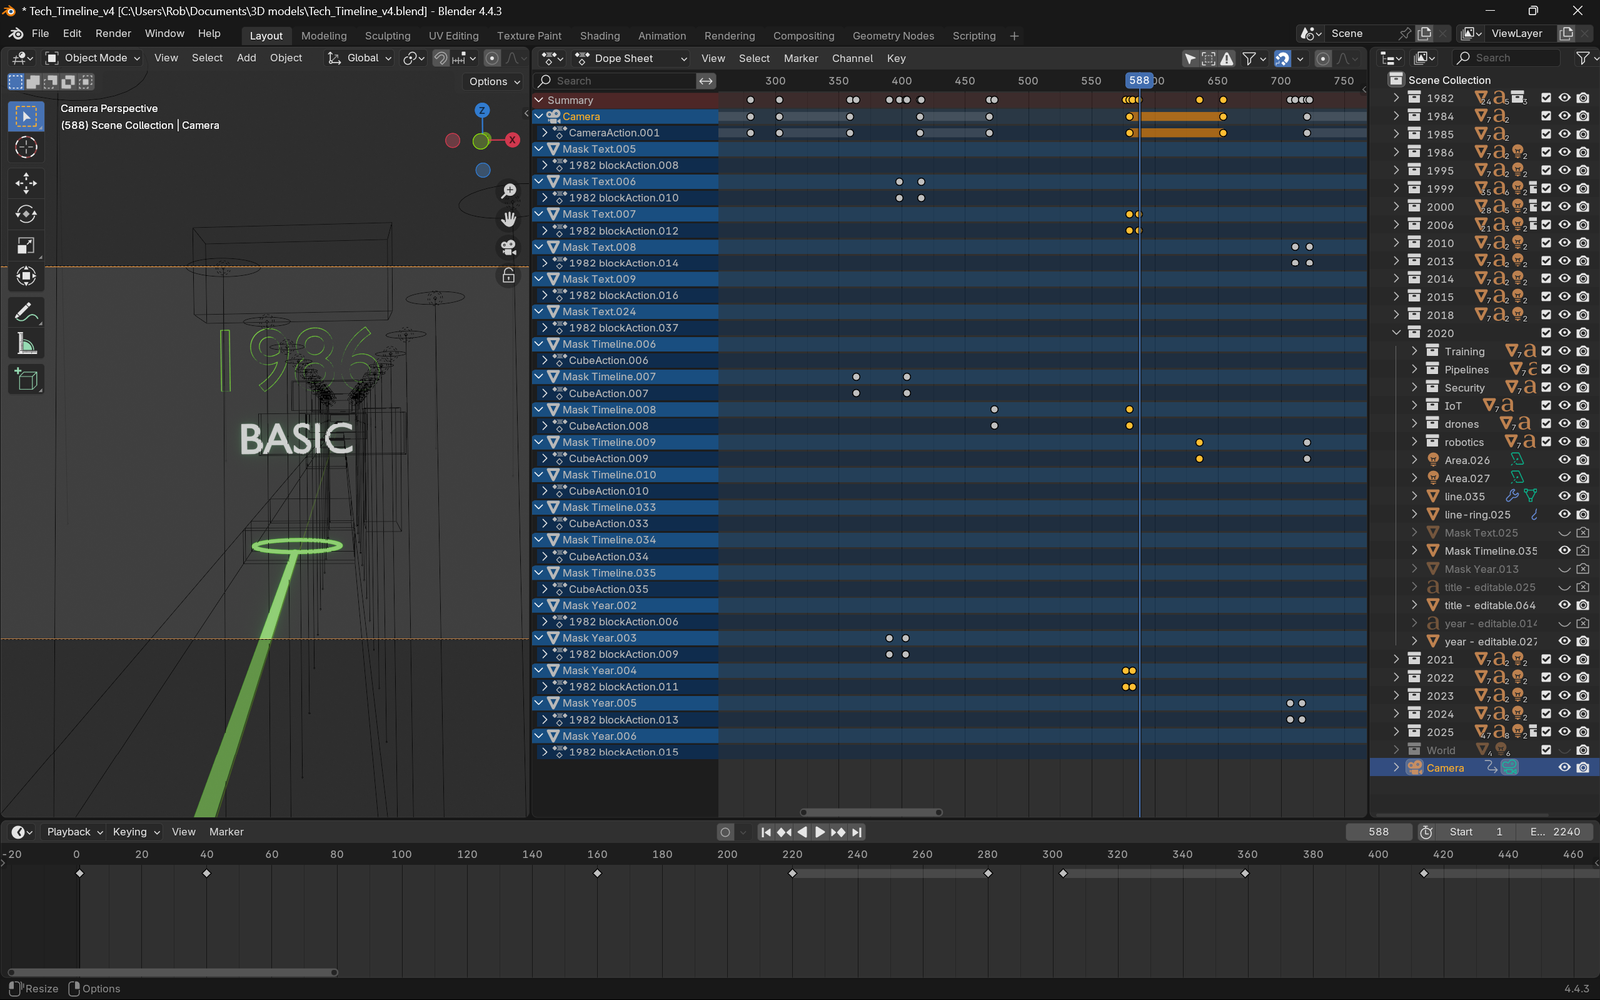
With that, I lowered my rendering settings to generate a full speed preview within minutes and I was able to iterate pretty quickly from there – still not an optimal workflow, but it did the job. Just make sure you use “show hidden” from the filter option to see everything!
What I found is that the animation was perfect to start, but became insanely fast! I realized that was a result of my computer lagging as I added more and more to the scene making me think the timing was solid when it wasn’t. I think Blender was trying to tell me with this red FPS warning that I needed to pay more attention to.
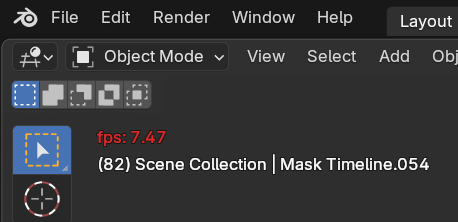
7 FPS means what I was seeing on screen was around three times slower than I thought! That’s why my mental timing was so off in the rendering, which left me no time to speak about each milestone.
Thankfully the dope sheet helped me clean that up, bit it’s still super quick at times. I was able to get my major points across in the voice over.
Normally, I would have a voice over to animate to. In this case I wasn’t sure what I was going to do until I had my technical approach nailed down. Once that was done I had a sense for timing to say what felt most important.
Without taking that approach the animation would have been twice as long and would likely involve me rambling.
I wanted to have it snappy to keep viewers engaged. That turned out for the best when it came time to do the final render.
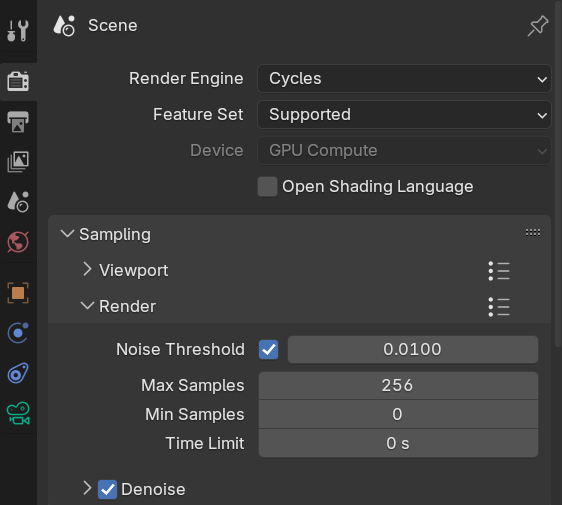
Render Settings
Once I got my timing dialed in, it was time to ensure my rendering was crisp and didn’t take days. Well…it still did!
Keep reading to learn where I landed…
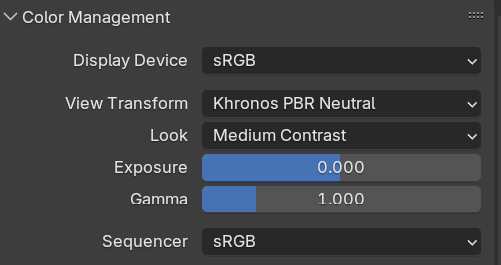
Color Management
Getting the color and contrast just right and making sure the edges of my lines and text were crisp took a bit of exploration.
With all that set, my test stills were taking about a minute to render per frame, so it was time to give it a full test run to see how things turned out.
THIS SUCKS! a 6 second animation is taking all day to render, so I’m hoping the tips in this video help after almost 4 minutes per frame:
Here are the final settings I landed on:
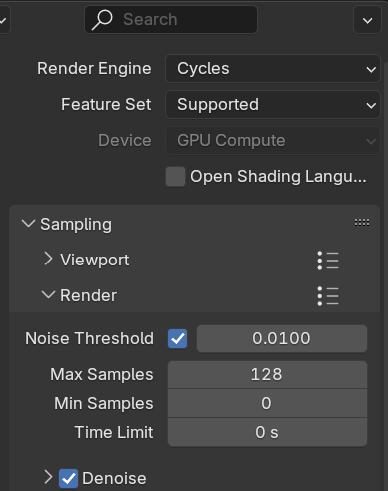
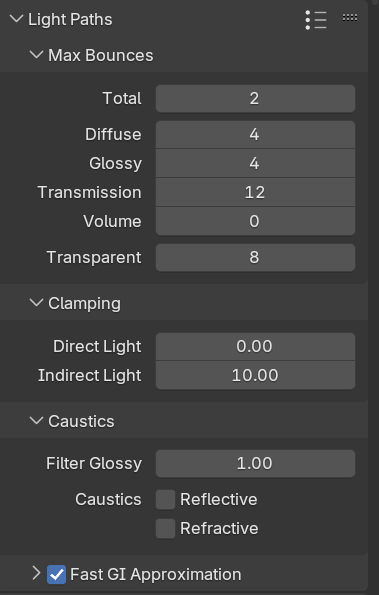
I used my 6 second ending animation to test how that improved timing, before running my full 2 minute timeline. I even dropped the transmission value down to 4 just to save a few second per frame.
Those adjustments helped with the shorter animation completing in almost 4 hours.
My full timeline took almost 40 hours!
Computer Power Settings
I learned the hard way that I needed to prevent my computer from falling asleep! That happened and totally wasted a whole night worth of rendering 🙄
Good thing I’m not on a time crunch for a client!
Ending Idea
I wasn’t sure exactly how I was going to end the animation when I started.
Then, it hit me! Have the timeline climb a wall to indicate that this is just the beginning.
It was almost a happy accident that I ended up diving down the “rabbit hole” that represents music, since that’s what is visible on my blog’s homepage right now and feeds into some upcoming work I’m waiting for an approval on before getting started.
Knowing the full timeline was going to slow things down, I decided to make the ending it’s own project that started where the timeline left off. With that understanding, I recorded what I wanted to say and kept track of the timing to dive down that music port at just the right moment.
Video Edit
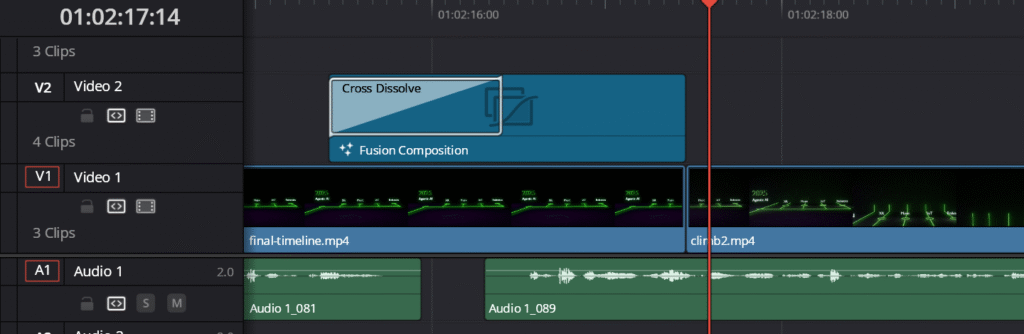
I had planned to wrap this animation with some video elements. I know that Blender has editing capabilities, but I’ve come to love Davinci Resolve and wasn’t interesting in adding more time with another learning curve.
To save time, I had created a still of the ending so that I could do a slow cross dissolve to bring in the background hexagon wall, since I worried that I would never get it lined up in perfectly between the two animations.
You can see where I bring the two animations together just to the left of the playhead below.
Music
Once I finally had the edit completed – it was time to add a musical element. I didn’t go all out and make a formal song for this, I just put something together quickly that worked.
Conclusion
Well…being someone who is used to cranking out animations on tight timelines – I didn’t think this would take as long as it did. The important part is that I learned a lot about doing motion graphics in Blender and I met my overall goal, even though it wasn’t as impressive as I wanted it to be.
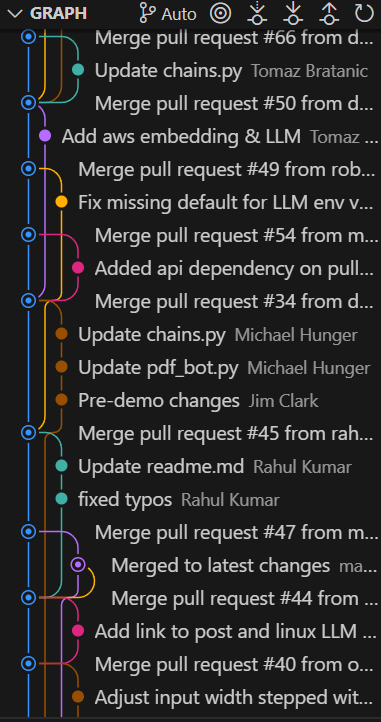
Going with glowing neon lights seemed cool, but it cost me in long render times. Had I met my full vision, I would have had 30+ lines to render! Who knows how long that would have taken. Here’s an example of what I was aiming for, which is the GitHub commit graph in VS Code, where I thought the main branch (blue) could have been the timeline:
While that’s not where I landed, I still think it does the job. I hope you enjoy the final result and that you’ve learned as from this challenge as I have.
Timeline Animation Video
Lessons Learned Video