I’m moving into my next phase of work where I leverage music that I create to move elements within a virtual world. While I’ve been exploring different approaches in previous projects, this time I’m shifting my focus to using the effectors and cloners within Unreal Engine’s Motion Design tool.
This will be the first step toward creating my next song’s visualizer, which will also determine the album cover design. That’s assuming I can come up with a design that I’m happy with.
I’ll be starting off with this video to get the initial feel for setting up various features, but I will be looking to shift to using DMX to allow dynamic audio input that I can control, vs using a predefined set of audio files like we see in this project:
Setting Up Unreal Engine 5.6.0
We’ll start with a blank project, then only add the plugins that were used in the video. In the video they were still experimental, while in UE5.6 they are officially in Beta. There were some new experimental plugins for motion design that seemed interesting, but I’m opting out of those since I don’t think we’ll need them. Plus, experimental features could lead to having to troubleshoot unexpected issues.
This is a perfect example of why I don’t create step-by-step tutorials! Even though that video is only 3 months old at the time I’m working on this, it’s already out of date. The UI has changed enough that I’m not seeing the features he’s showing and have to go digging around to find them.
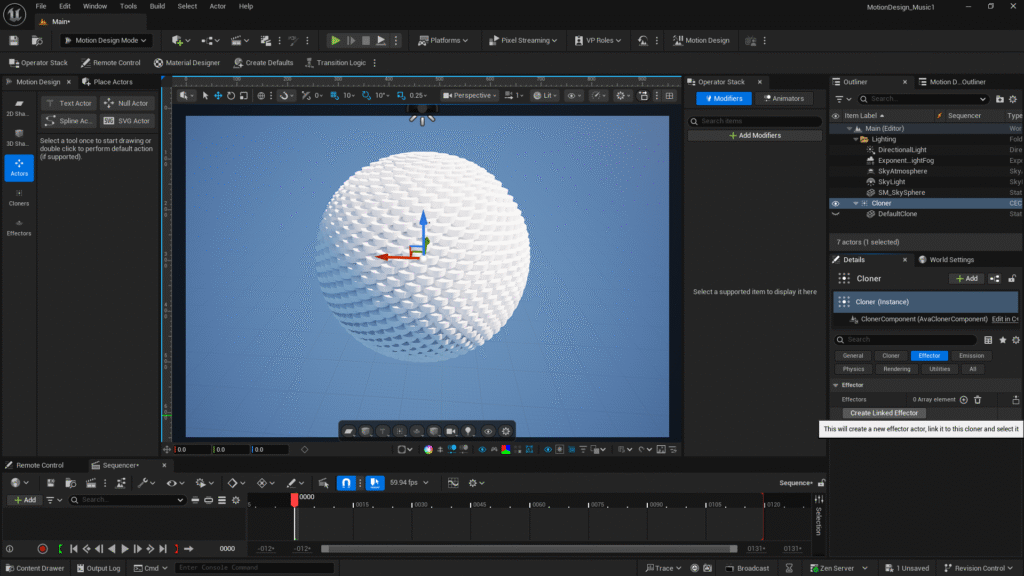
For example, he right clicks on the cloner to create a linked effector, but that’s not available in 5.6. You have to select the cloner, then open the effector tab in the details panel and hit the button to create a linked effector.
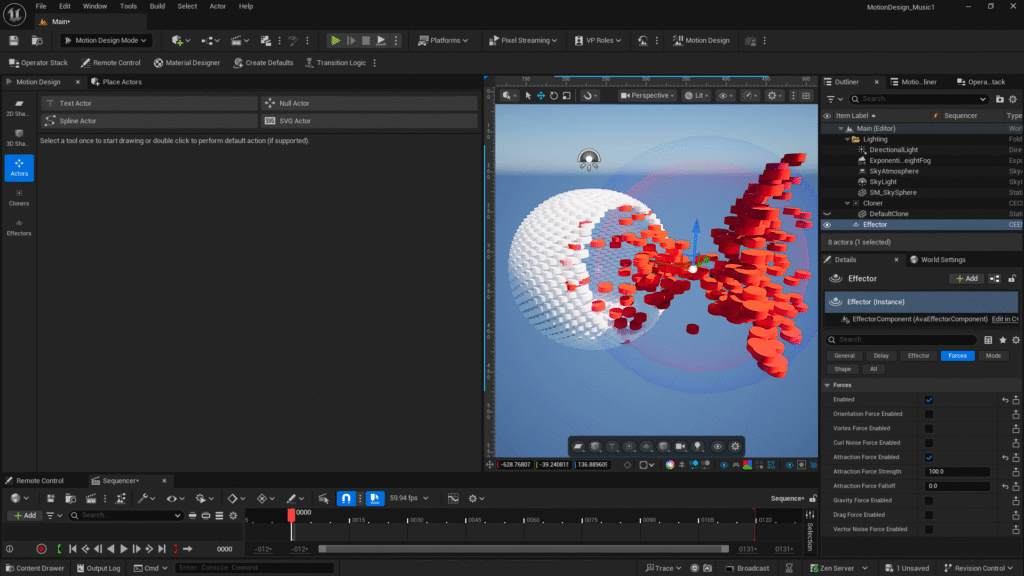
I’ve set mine up to not worry about the cloned shapes just yet, so I’m making that a simple shphere made of cylinder s rotated to almost create steps that a character could climb on.
At this stage, I find myself spending lots of time just playing with the effectors and the different options you have to play with. For example, the attraction force that pulls the “particles” into the effector’s inner sphere.
Adding Audio
For now, I’m going to use an audio file as the input just to see what happens and understand how that works, since I’ll probably use the Sequencer in my final visualizer, so I can manage cameras and different views. Not really sure what I’ll do yet, but keeping my options open.
Haven’t not done anything in the sequencer before, I found it tricky to get used to how to maneuver around. It took a bit to figure out that alt + scroll was the easiest way to scroll out enough to see the whole song.
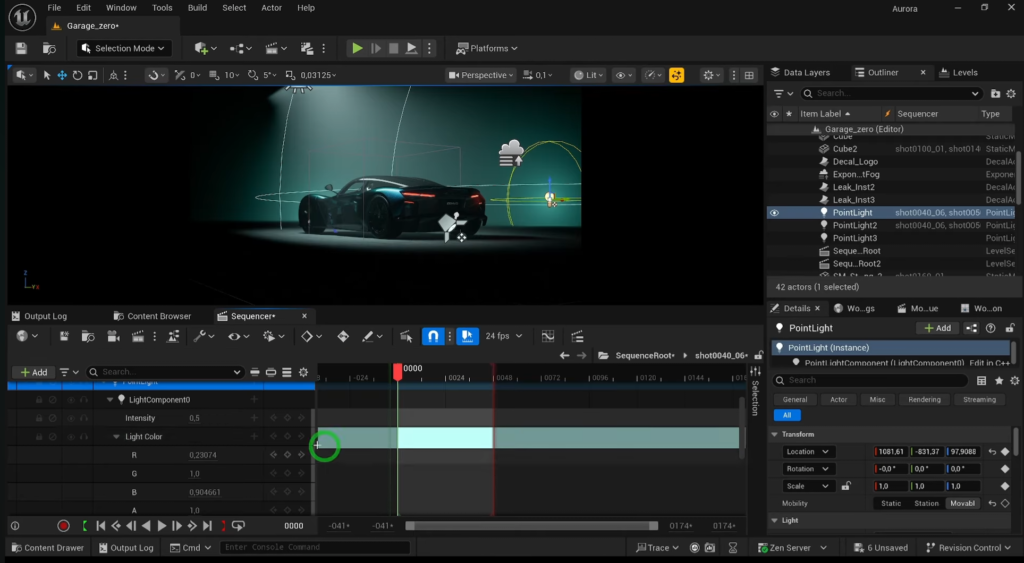
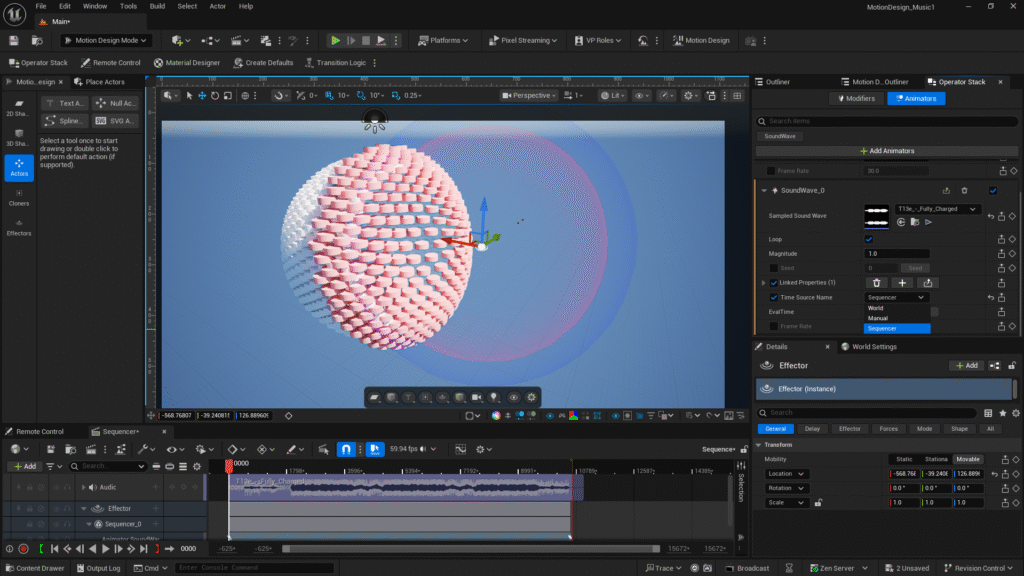
Here’s how I’ve setup the SoundWave animator to use the sequencer, which has my first single, Fully Charged, loaded up.
Checking DMX
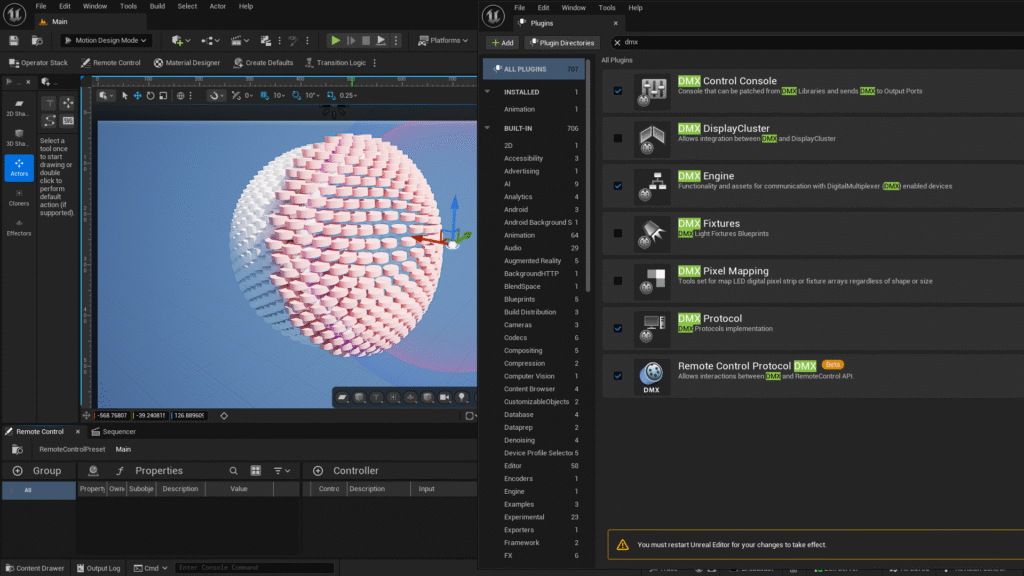
Since I really want to be able to control the effector with a dynamic audio feed, instead of a file, I’m enabling DMX. You can see there’s a Beta Remote Control Protocol DMX that seems like it might connect to the Remote Control properties in the lower left corner of this next screenshot:
Now, we’re flying blind as I have not found anyone else doing this.
Sure enough! After restarting, we can see the DMX protocol is listed under the remote control:

My guess is that I should be able to map the DMX Library to properties in a similar way to how I setup my DMX lighting in this project.
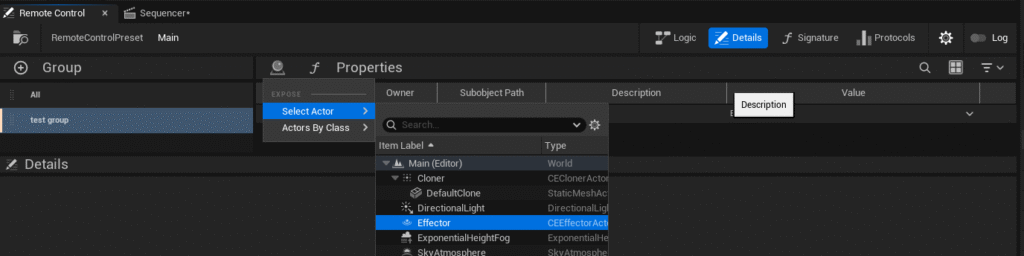
Before I dig into the DMX I want to figure out how to setup the remote control to manage properties on a specific actor. I finally figured out you have to right click to get the ability to add an actor. Here, I’ll just select the effector to get a feel for what we can do.
I was following this video, but it’s clearly way too old to do much more than understand what the Remote Control API is even designed for.
I eventually figured out that right clicking on a property was the trick to exposing it to the remote control’s props. I set things up so the Effector’s X-axis is what we’ll control.
DMX Fixture Set Up – Attempt #1
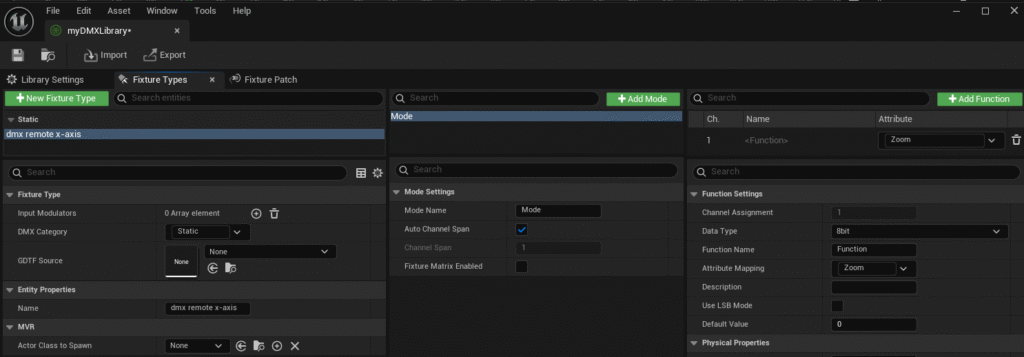
Since we’re just running a test here, I’m setting up a simple fixture to have a zoom function. We’ll use this to move the Effector along the X-axis.
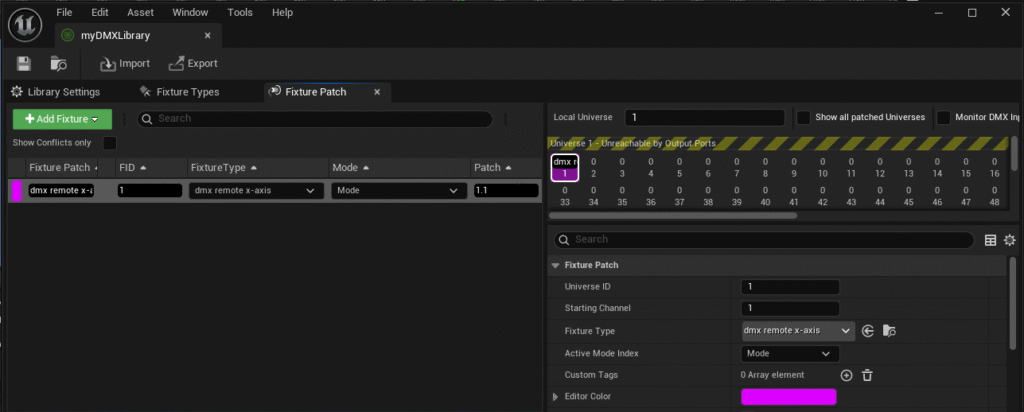
Next, we need to patch our fixture so it can receive data, making sure we have an input port setup under the DMX project settings. Here’s what that looks like with our zoom setup on channel 1 in universe 1.
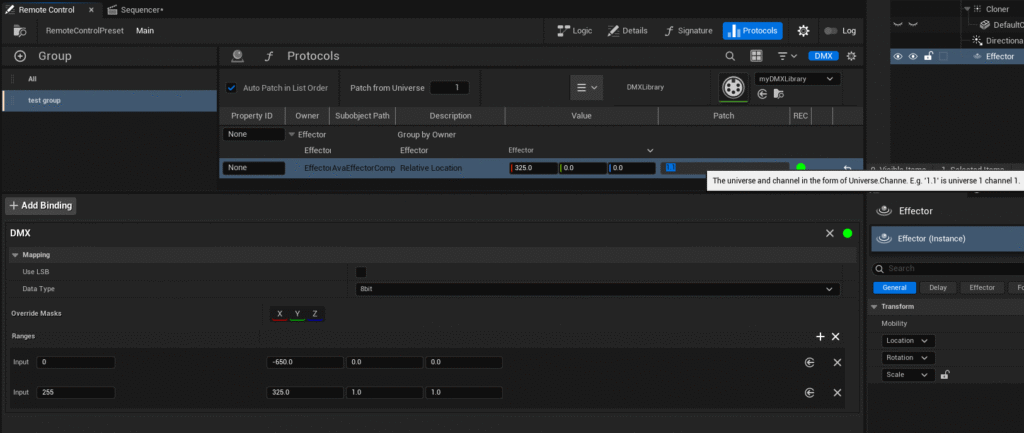
The next logical step seemed to be setting up my remote control to have a binding added. Doing that automatically set my patch to use the proper universe and channel I had patched. I then setup the mapping so the DMX value will map to a particular range of location values. The way this is set, the Effector should move from one side to the other to adjust it’s position in relation to our Cloner sphere.
Unfortunately, that setup wasn’t doing the trick. I could use my DMX control to adjust the value and see dmx data being sent, but it wasn’t impacting my Effector’s position.
Got DMX Working!
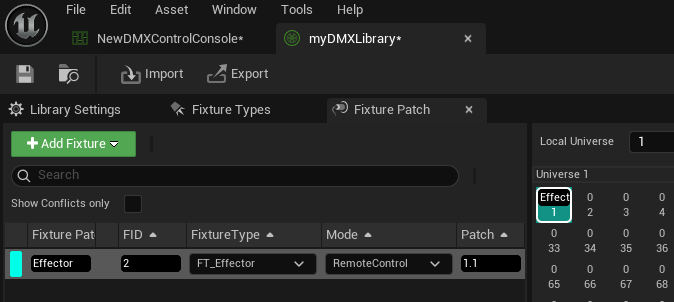
After poking around a bit, I figured out that creating the binding also creates a new patch. That makes what we did above completely irrelevant and also caused a conflict with what I made above, so I just ended up deleting my fixture patch to free up channel 1.1 for the effector fixture that was created.
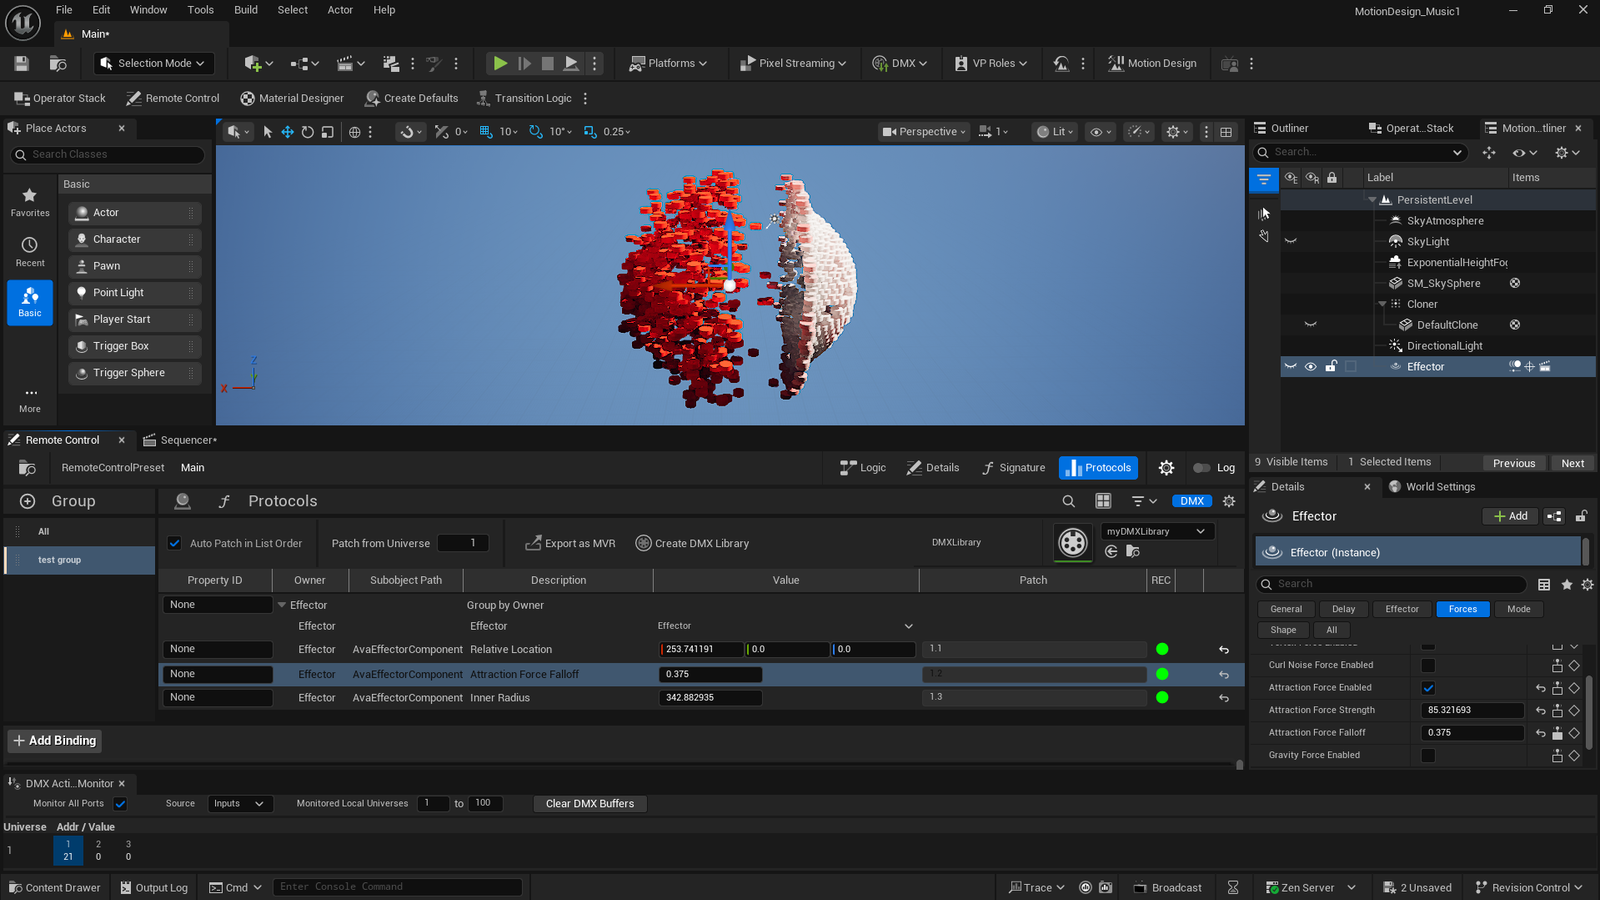
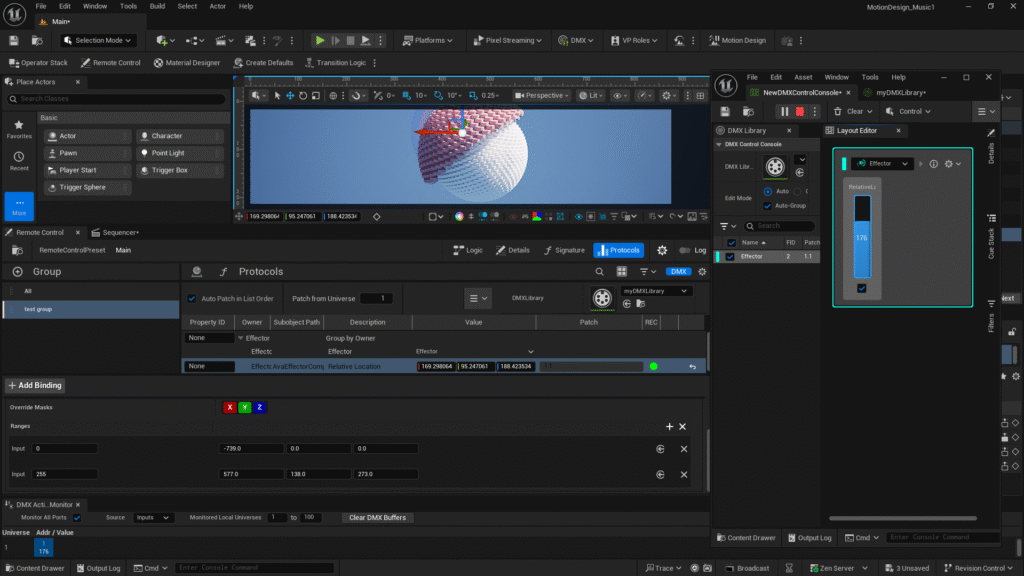
Here’s how the scene looks after I also figured out that you need to select the “Override Masks” to get the DMX Controller to effect the X,Y, and Z values:
Using TouchDesigner to Send DMX
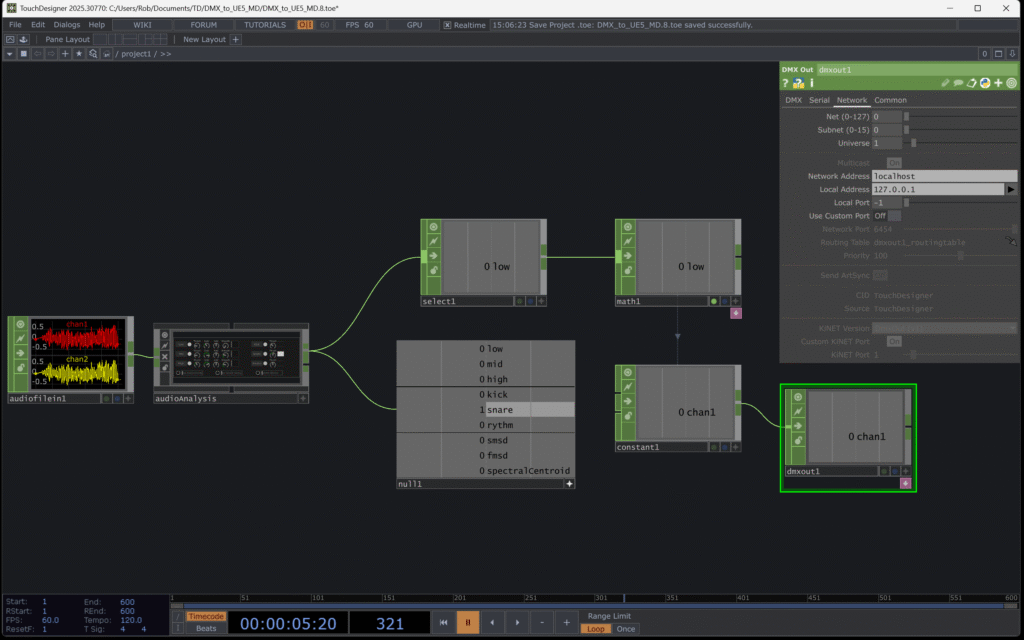
Now that we know we can control our effector with our DMX control, we can move on to setting up TouchDesigner to handle that for us dynamically, which was the ultimate goal. We can easily swap out the AudioFile CHOP for an AudioInput and pipe music in from any source – like live audio as I play it.
This is a super basic network setup to pass your audio as DMX data. Just be sure to set the DMX interface to ArtNet on the DMX out CHOP’s DMX tab.
Time to Get Creative
Now you have everything you need to start being creative with this. The trick is figuring out what to do!
Since this is just me exploring, we’ll continue to see what else we can do as we add expose more properties and map them to new DMX channels.
At this point we’re back to playing with settings just to see what happens.
Final Version
Here’s a screenshot of the final settings that I exposed to the remote controller and adjust with DMX values:

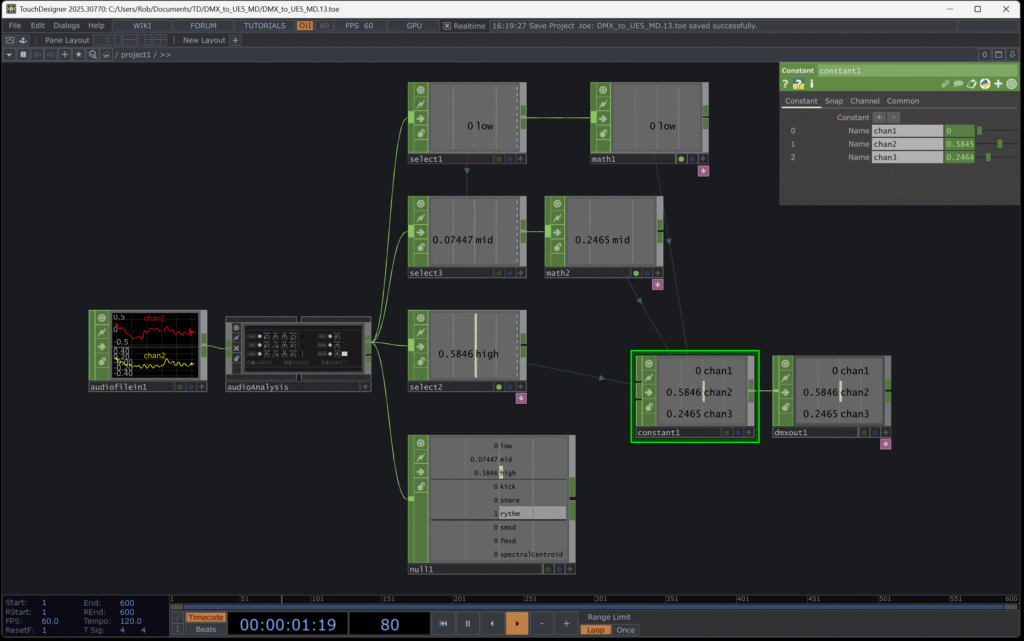
Here’s the final TouchDesigner network I setup to pass DMX over 3 channels:
To see how all that turned out, you’ll have to checkout the video I created for this project. I admit, it’s not the greatest, but it works as a demo to get our minds wrapped around what we can do now.
Files on GitHub
If you’d like to use the project files for UE and TD that I created for the following video, you can access those on GitHub here.
Project Video
Here’s the video walk through I created on YouTube: