Continuing my exploration into developing interactive spacial experiences for different XR platforms, Unity has been the most common tool used by all of the major contenders in the industry. That makes it easy for me to know where to place my focus from here on out.
I’m currently working through Unity’s Live Learn: Road to the Metaverse series and have been enjoying the process quite a bit!
They’re estimated 1 hour per tutorial has been more like 2 hours. I’ve also found that the guys doing the session assume it only takes a couple of minutes to complete all the steps they walk through in their “watch and learn”, but the reality is you’re better off going through the process as they show it. There are just WAY to many details to keep in mind. Plus, the video UI doesn’t make it easy to go back to specific sections of the walk through. It’s still better than attending an in person live session, which I’ve done before, but I’ve found about 3 hours total per session is what I have to plan for.
So far, I’ve only worked my way through the following sessions:
My favorite one so far has been Animation tutorial, mainly because it’s brought everything together and starts adding some interactive states that allow you to control an animation. For example, if you checkout Apple Vision Pro’s article about developer tools to create spatial experiences, you’ll see this video of how medical students can interact with an exploded view of the human heart.
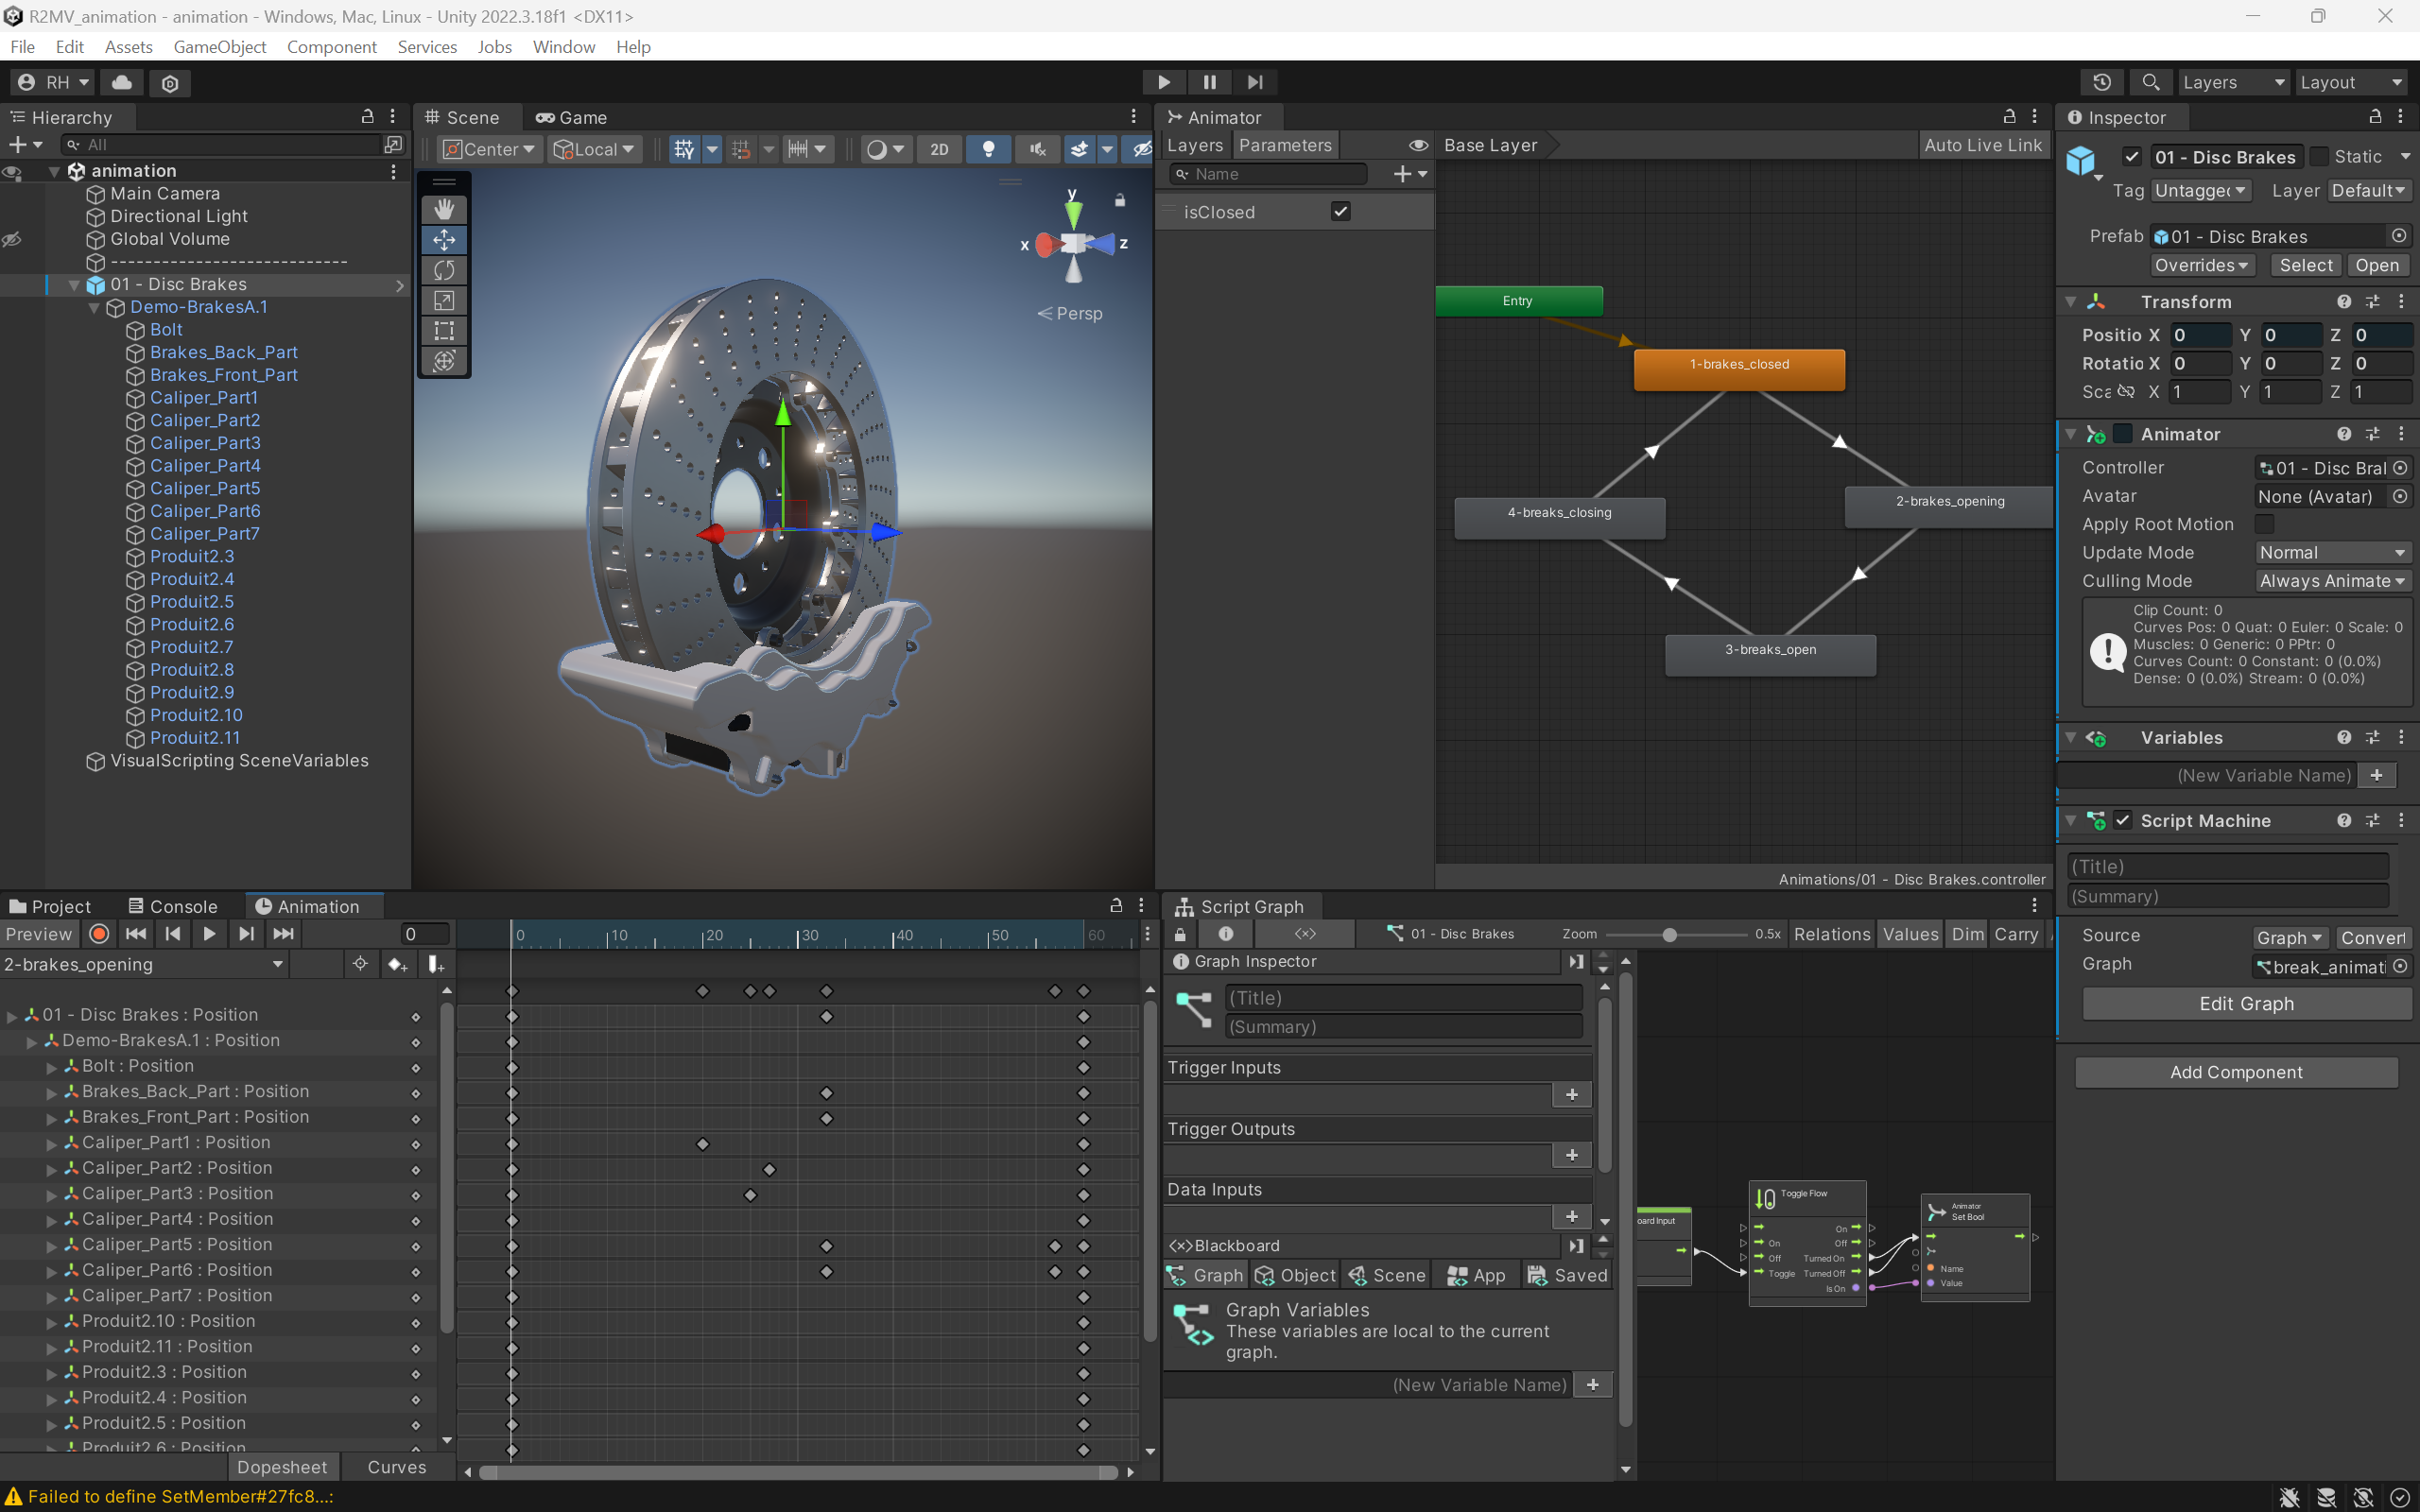
In the Unity Animation tutorial, you’ll create something similar using a 3D model of a car’s break components.
Here’s a video of what I created by following the Animation tutorial. In this, it’s set up so the exploded view starts in the “closed” state, just like the heart above. Watching the state machine components in the lower portion of the video, you can see when I hit the spacebar to initiate the “open” state. It’s setup as a toggle so if the animation is open the spacebar will close it. It’s really quite straightforward once you get the hang of it! You’d just need to swap out the spacebar interaction with a “pinch”, or other hand gesture that seems appropriate for the experience you built the animation for.
I absolutely love this kind of stuff and can see major potential in utilizing these new skills in a variety of ways to create immersive experiences.
I’m worried I’ll start to get bored as I work through the next sessions in the series that cover render pipelines, but that is really important stuff for me to learn if I’m serious about this type of work.
I’ll be looking forward to the time when I can navigate around a virtual world and stumble upon something I can interact with like this. Hopefully that doesn’t take too much longer 🤣
Here’s everything used to create this in one screenshot, which I decided to use as the header rather than trying to create something with Stable Diffusion.

Top Left: The 3D Model
Top Right: The Animation’s State Machine
Far Right Panel: The Model’s Properties Panel
Lower Left: The Animation’s Time Line
Lower Right: The Visual Script Graph