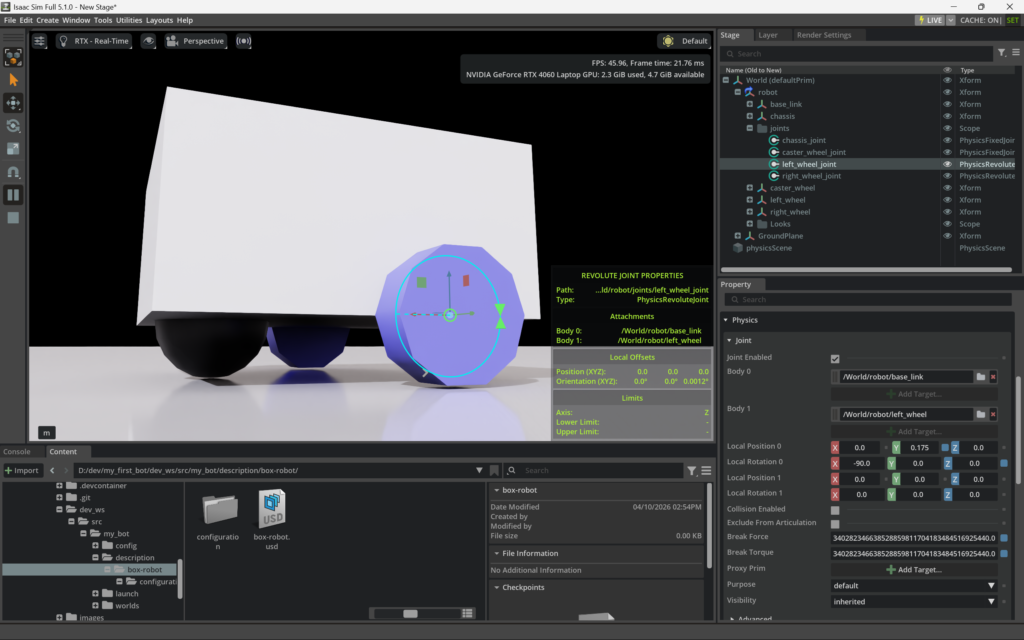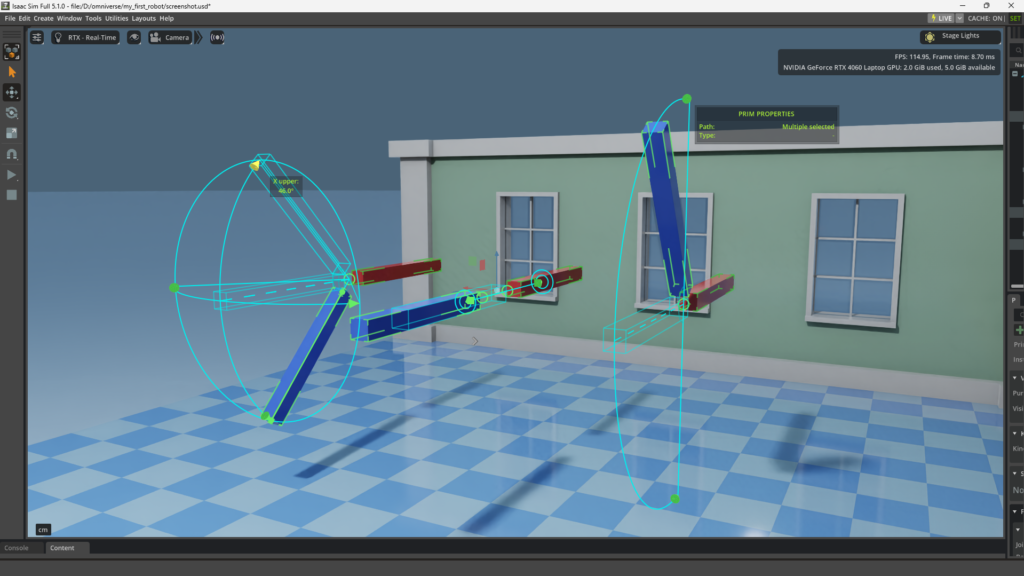
It’s been fun to watch NVIDIA Omniverse evolve from a heavyweight, launcher-based distribution model to a lean, developer-first approach and now to a modular architecture that lets developers integrate Omniverse technologies into virtually any application. This evolution isn’t just optimizing the developer’s experience, it also includes a shift to enhance agentic development, which is my favorite use case for AI.
In this article, I’ll share how I prompted Devin AI agents to use the NVIDIA Omniverse ovrtx library to build a simple RTX USD Viewer that allows you to load a USD scene and interact with the prims in your browser. You can access the project files to run the application locally and study the code to help you understand how to integrate the NVIDIA Omniverse ovrtx library into your own project.
The goal of this POC was to help me become familiar with the new NVIDIA Omniverse libraries and to demonstrate how I leverage agentic development to learn new technology by building applications, while barely writing any code. Here’s a video walk through of this project in case you’d like to watch this process in action:
Agentic Development
It’s no joke when I say agentic development is my favorite use case for AI. You may have seen my videos where I share the harsh reality of AI video production. I’ve fought endless battles trying to get AI models to meet my video project requirements. Images are something I can get decent results with, but once I experienced AI built into my IDE (integrated development environment) I knew I had found my favorite AI tool.
I’m lucky enough to have started with enterprise-grade access thanks to my employer providing me with a license for Windsurf, which recently became Devin Desktop. This allows me to get a ton of work done while still having plenty of credits left over. I haven’t tried using Devin on my personal Tech-Multiverse projects, so this will be my first trial run.
Devin AI Free vs. Paid
I always aim to keep Tech-Multiverse project costs to a minimum. A key reason is to show what you can do on a minimal budget. In this project I’ll start off testing the free Devin AI account to see how far we can get. While I still believe it could be useful for anyone wanting to learn without investing anything more than time, I found that paying $20 per month for a pro account makes a massive difference.
Devin Free Account Test
To give you a sense of this difference, I started day one of this project with 100% of my free quota available. I chose to follow a tutorial that used the full NVIDIA Omniverse skills library repo that included 40 other libraries. I believe that caused the free Devin model to hallucinate enough that I burned through the day’s credits trying to resolve errors where the agent thought my hardware was the issue even though I had proven the ovrtx examples ran fine in isolation.
On day two, I took a different approach by starting with an empty project and simply describing what I was looking for in my prompt. Here’s the prompt I used to kick-off development:
We’re starting off with a brand new project. No files, nothing! You have full control over how all this gets setup. What I’m looking for is to create a real-time USD viewer that runs in the browser and loads any local USD scene and allows me to interact with prims. I assume we need to use these new Omniverse libraries: ovrtx ovstream ovphysx You can learn more about them here: https://developer.nvidia.com/omniverse We are running in a conda enviroment, which has UV installed. I’ve also proven that ovrtx runs on my machine and successfully ran the test to load and render a scene. we’ll start with a simple RTX Viewer and will add features as we go. Let me know what you need from me.
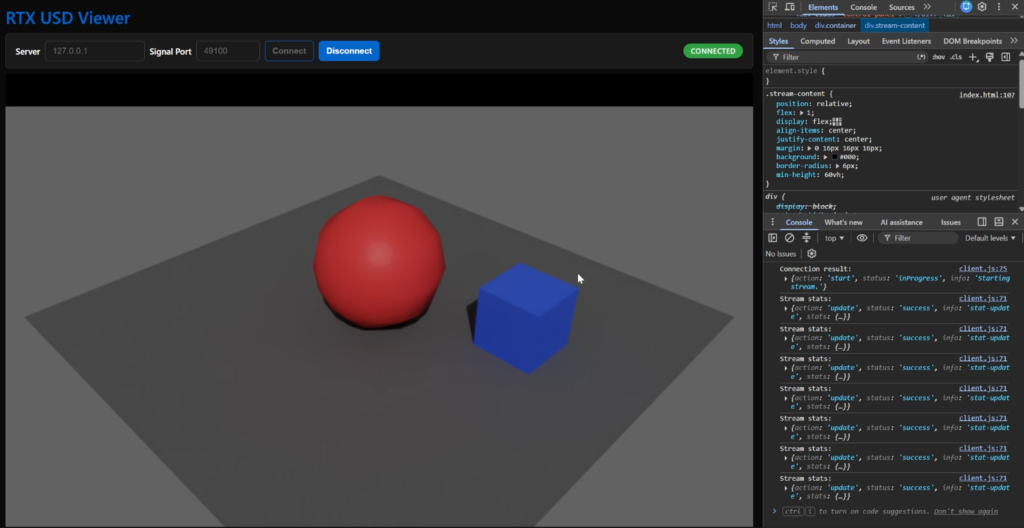
Approximately forty-five minutes later, after the agent had me handle some of the installation processes and work through a few errors, we had a successful build of a USD viewer. It was very basic with no ability to interact with prims and it required me to manually connect to the server to view the final rendered scene. Here’s what that looked like:
That ended up burning through another full day’s usage quota, which left me with very little quota for the rest of the week on my free account.
Devin Pro Account Test
That’s when I decided to sign up for a Devin Pro account for $20 per month to compare the difference.
I started with another empty project and used the same prompt. I decided to use Devin’s “Adaptive” mode which picks the most cost effective models for different tasks to optimize quota usage. The agent started planning, then incrementally building and testing it’s work as it made progress.
Forty minutes later, the agent let me know the server had already been started and was ready for review.
With zero errors and no actions needed from me, we had a fully functional application that allowed me to select prims in a USD scene and move them around using buttons it provided. Here’s a screenshot of that where you can see the control options to interact with prims in the left panel:
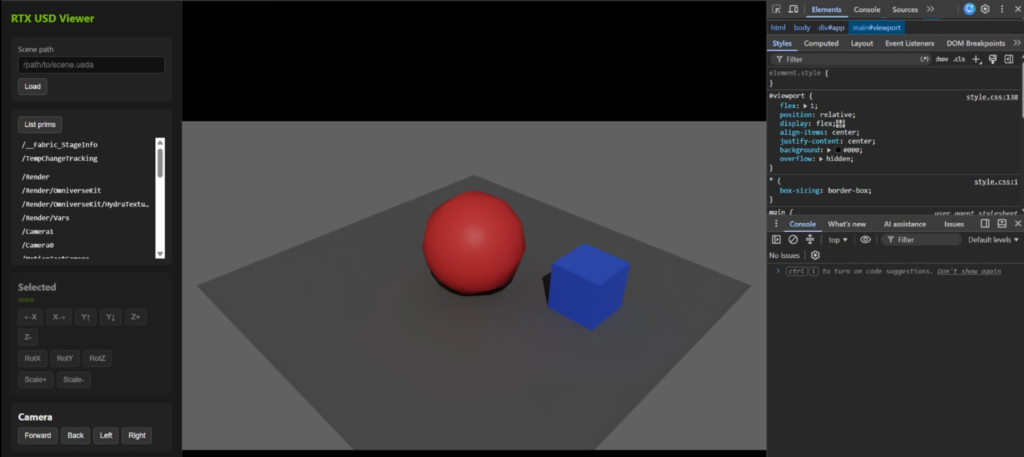
The Pro version’s final application worked perfectly. I continued working with the agent to improve the experience of loading a USD file and asked it to prep the project to share with others by doing a little house cleaning and ensuring the code was well commented. By the time I was done I had plenty of my quota left for the day, which was great to see.
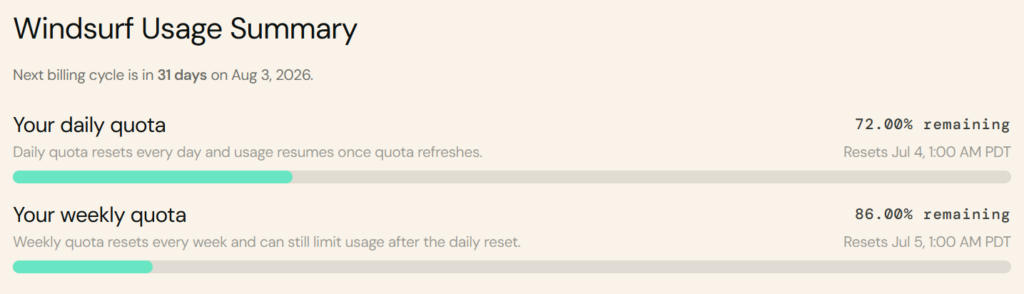
You can see how much of a difference the pro account made. The overall project quality was much better, too. That’s valuable if you’re using agents to help you learn something new.
Human-in-the-Loop
While the pro agent did an amazing job, I still found the installation instructions to be a bit clunky. The agent even got some information about the setup incorrect, so the final optimized developer experience required some human refinement.
As the person who evaluates and documents how to implement new tech, I care about making sure other engineers can get up and running smoothly.
Here’s a screenshot of the final installation instructions, which are available on GitHub and assumes you have Anaconda installed to manage your Python environments:
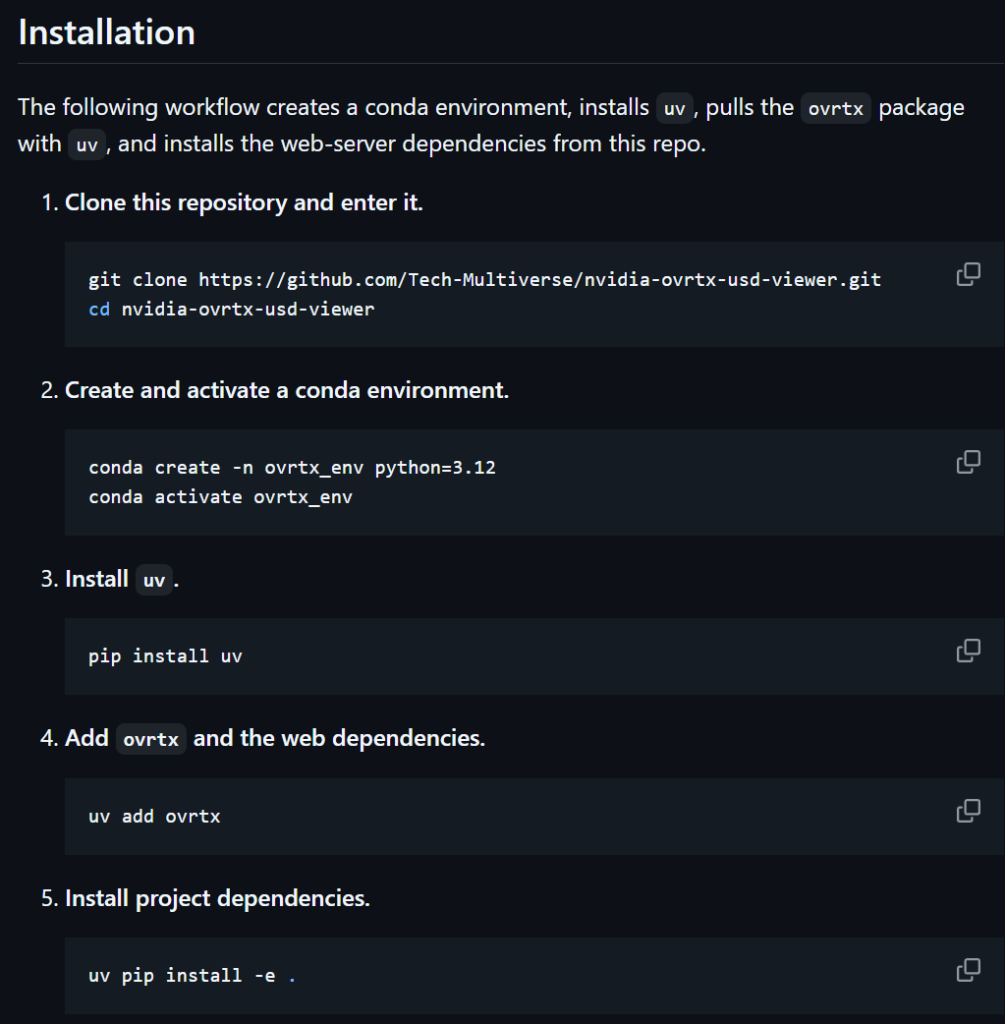
Conda is my preferred Python environment manager. You can use yours by adjusting step 2 to fit your needs.
Once you’ve followed those steps, simply run this command to start the server and navigate to http://localhost:8080 in your browser:
python -m rtx_viewer.serverProject Architecture
Let’s dig into what the agent built for us.
The agent chose to use a FastAPI server, which loads the RTXViewerRender to call the ovrtx renderer. Images of the USD scene are streamed via a WebSocket to the browser, while REST is used to upload the USD files that you browse to using a button. The actual loading of that USD file into the renderer happens over the WebSocket via a load command, not REST. That same load command is tied to an optional second button you use to load a file if you enter that file’s path into the available text input.
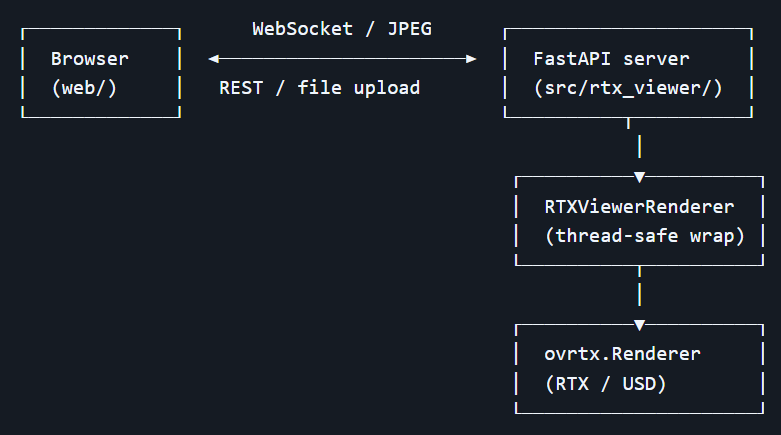
Here’s a breakdown of the files you’ll find in this project. The file names below link to each file on GitHub so you can review the full code.
Server Files
| File | Purpose |
|---|---|
src/rtx_viewer/renderer.py | Thread-safe wrapper around ovrtx.Renderer. Handles scene loading, frame rendering, picking, selection outline, and prim transforms. |
src/rtx_viewer/server.py | FastAPI application. Serves the static UI, exposes HTTP endpoints, streams frames over WebSocket, and routes commands to the renderer. |
Client Files
| File | Purpose |
|---|---|
web/index.html | UI layout. |
web/app.js | WebSocket client, frame rendering, and interaction handling. |
web/style.css | Dark theme layout. |
There are also standalone helper scripts to verify the environment, the renderer, and the WebSocket pipeline, which you can find in the scripts folder. Those are what helped the agent validate it’s progress during development. This is the key reason the application ran the first time without any errors, since you could watch as the pro account agent resolved issues without any human intervention.
Next Steps
I’ve seen some very impressive demonstrations of what you can build with these libraries. My plan is to leverage my Devin AI pro account to help me build an application that allows you to have more control over USD scenes and possibly export custom media assets. I’d also like to add support for physics and be able to select the robots in this project’s USD samples.
I thought robots weren’t selectable because ovphysx isn’t integrated yet, but Claude AI seems to think it could be due to other reasons. We’ll get that figured out and I’ll be sure to share what I learn in a future article.
I’m also planning to integrate ovstream, which will replace this project’s FastAPI, but that will add some complexity, which I was trying to keep to a minimum in this first run.
Wrap Up
I really enjoyed this project! I’m especially excited to explore what else I can do with these Omniverse libraries.
This confirmed that a Devin AI Pro account is well worth the $20 per month.
These AI agents are lowering the barrier to entry for anyone who has a digital product idea, but doesn’t have the engineering experience to build it. Having that experience, however, still helps to ensure what you build reaches it’s true potential.
I hope you found this article helpful and that it inspires you to grab your favorite development agent to build you something cool using the Omniverse libraries. I also encourage you to checkout Omniverse Labs, which showcases internal NVIDIA Omniverse Team projects intended to help you learn from the examples they provide.
The Omniverse Community is where I got the inspiration to create my nut and bolt digital twin tutorial. It’s a great place to learn about NVIDIA Omniverse and to see what others are building with it.